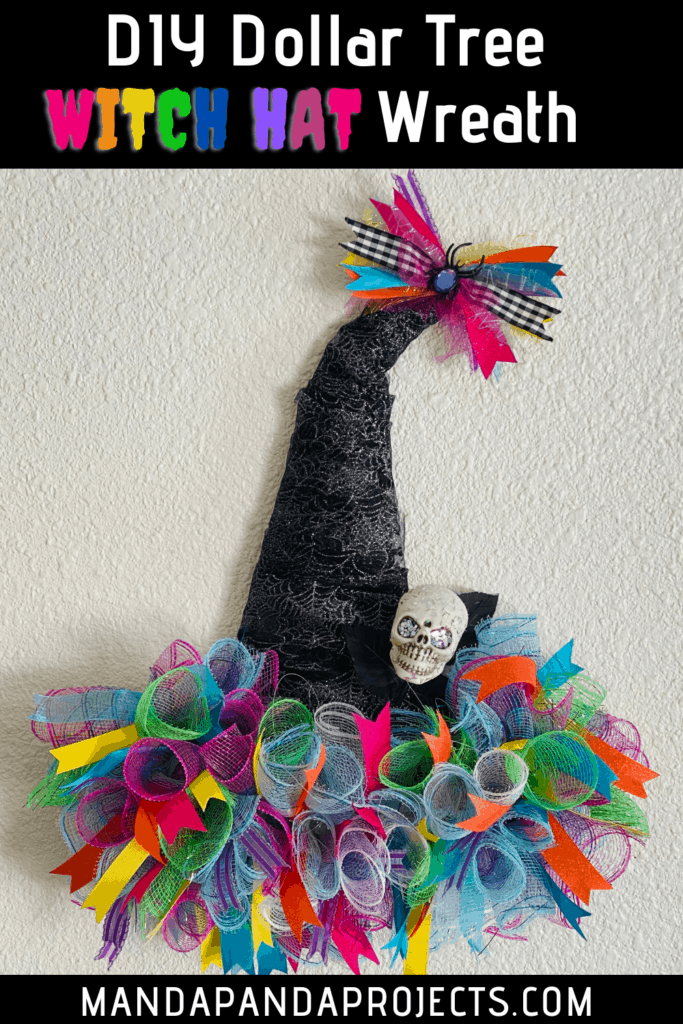
Double Double, toil and trouble! A dash of deco mesh, a cauldron of glitter, a dollar tree wreath form, and you’ve got yourself a DIY Deco Mesh Witch Hat. This one is not your typical Halloween DIY wreath though…this one steps out of the orange and and black box, and steps into the Rainbow!
We are doing things a little different this year when it comes to our DIY Halloween decor, and this Dollar Tree Deco Mesh Witch Hat Wreath is no exception. I don’t know if it’s just the craziness of the whole year or what, but we’re going full on Rainbow Halloween Decor. I’m not just talking regular rainbow either, I’m talking Lisa Frank type rainbow! Ya know, ‘Unicorns and Rainbows Lisa Frank’ with the school folders and pencils?!
If you aren’t feeling the Lisa Frank style, you can always use traditional rainbow colored mesh and ribbon. Or of course, you could nix the multicolor altogether and go the orange, black, and purple route. But c’mon, the Rainbow is way more fun! I don’t know where the idea came from, maybe it’s just my love (eh hem, obsession) with all things color, but Halloween looks like the rainbow threw up in my living room!
If you are feeling a little different this year too, make sure to check out the Blinged Out Coffins and the Rainbow Pumpkin Topiary that we made just for this unique decorating year. This colorful Dollar Tree Deco Mesh Witch Hat is going to look great with rest of your DIY rainbow decor!

This DIY Mesh Witch Hat is super easy to make
All of the supplies used to make this DIY Deco Mesh Witch wreath came straight from good ‘ole Dollar Tree, right down to the rainbow glitter I used to bling out the skull wreath pick. Does this Witch Hat or does this Witch Hat not look super fancy to make? Would you believe me if I told you it was SO easy and you could totally make it too, even if you don’t consider yourself a “crafty” person. Deco Mesh, by nature, is a little difficult to work with, but the “burrito method” I use (I made that up) makes this DIY Witch Hat Wreath super easy to make, while still looking like some high end boutique decor.
DIY’ing this Witch Hat was a little time consuming, but if you roll the little deco mesh and ribbon burritos while watching reruns of Friends for the 100th time, you’ll have it done in no time! The other thing that makes this Rainbow Mesh Witch Wreath so exciting, is that it cost only about $13 to make, and you’ll have a ton of rainbow color ribbon left over. I chose to use all different styles of ribbon; mesh, satin, sparkly, just to make this DIY extra fun and funky.
This post may contain affiliate links for your convenience (which means if you make a purchase after clicking a link I will earn a small commission but it won’t cost you a cent more!)
Supplies Needed to Make a Dollar Tree Deco Mesh Witch Hat Rainbow Wreath
As I mentioned, everything you need to make this Deco Mesh Witch Hat can be found right at the Dollar Store, but in the event you aren’t able to find something, I’ve linked to the closest Amazon version of each item below.
- Black tinsel Witch Hat decoration (you could use the Witch Hat wire wreath form, but may need more mesh to fill it)
- Pink and Blue Ombre Deco Mesh – 2 rolls (Amazon has a super pretty rainbow mesh)
- Green Deco Mesh – 1 roll
- Black and silver spiderweb tulle – 2 rolls
- Dark Pink ribbon
- Orange ribbon
- Yellow ribbon
- Green ribbon
- Blue ribbon
- Purple ribbon
- Buffalo Check ribbon
- Silver pipe cleaners
- Fake Jewel Spider
- Glue
The below supplies are optional if you want to include the Glitter Skull wreath pick
- Skull wreath pick (optional)
- Mod Podge or Glow in the dark paint (optional)
- Glitter (optional)
How to Make a DIY Deco Mesh Halloween Witch Hat
Follow the below easy steps to turn a Dollar Tree Tinsel Witch Hat Decoration into a beautiful Rainbow Deco Mesh Witch Wreath.
Remove the black tinsel and the ‘Boo’ from the Black Witch Hat decoration, leaving only the plastic wreath frame.
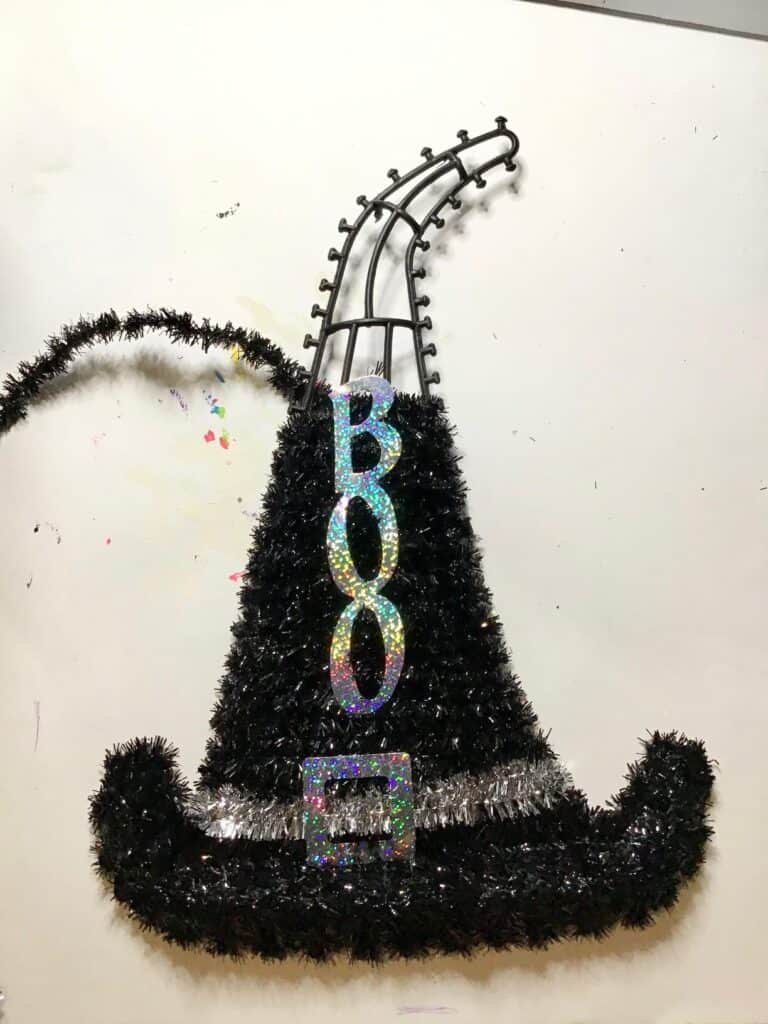
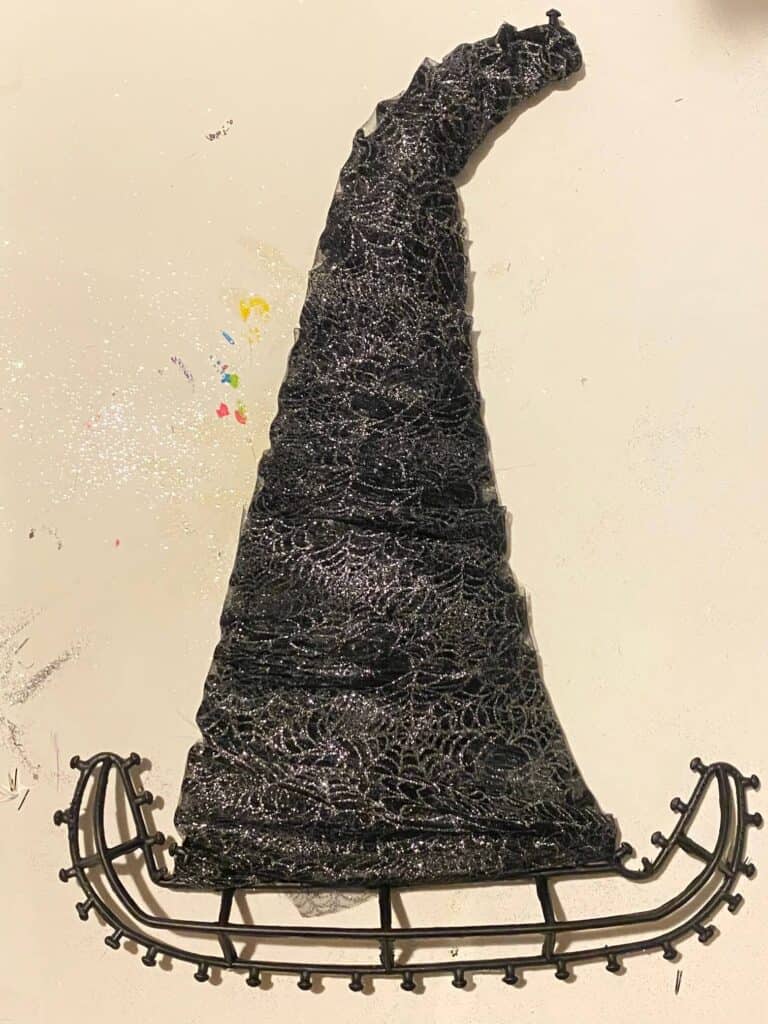
First, tie the end of the tulle around the tip top of the hat frame to hold it in place.
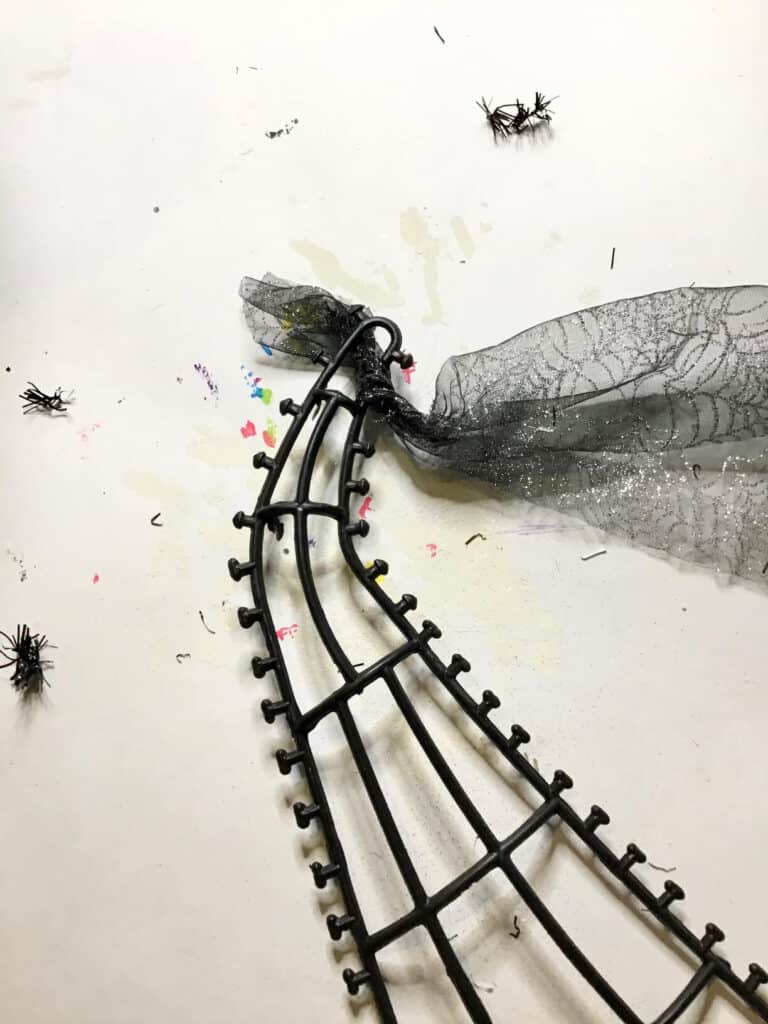
Begin wrapping around in a diagonal fashion, overlapping the tulle a bit so that the plastic frame doesn’t show through. You will want to keep the tulle folded and bunched a little as well, so that it’s thicker and provides better coverage. Continue to wrap until the top portion of the plastic Witch Hat frame is covered with black tulle.
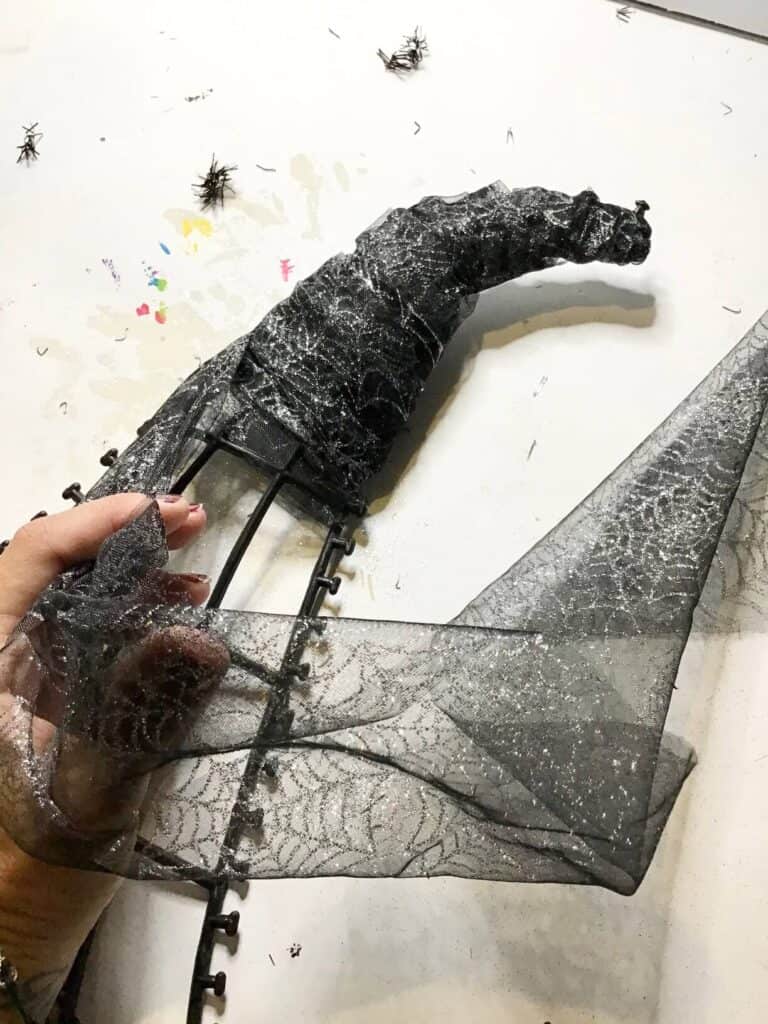
Once the entire top portion is covered, glue the end of the tulle in place.
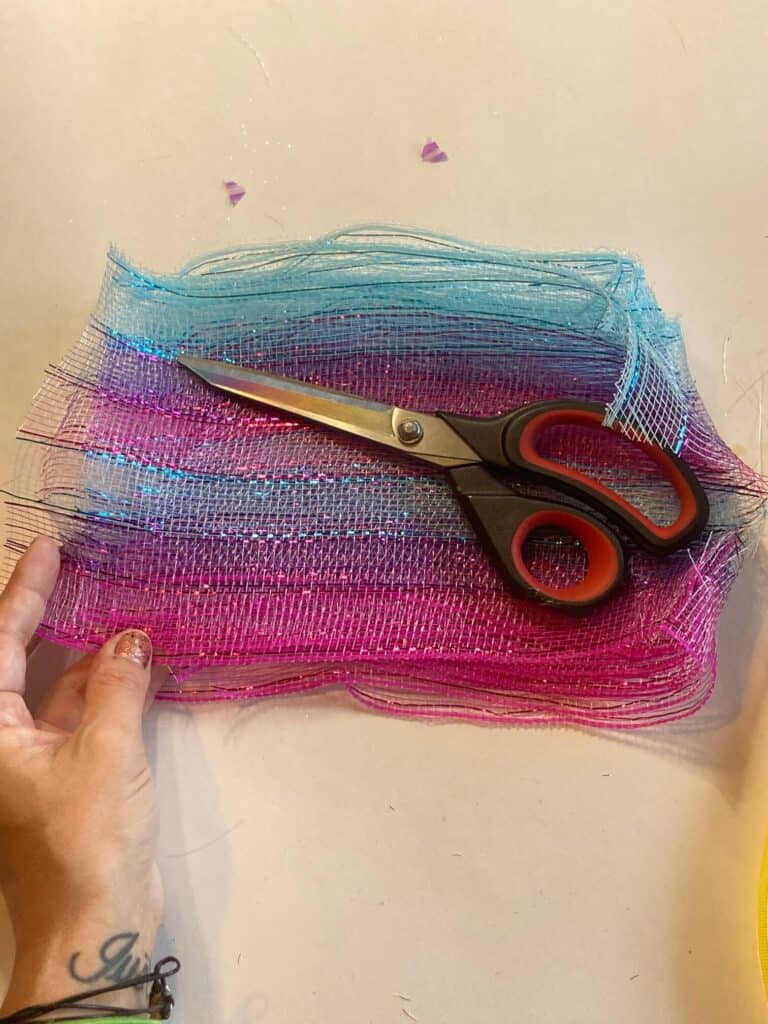
Cut the pink and blue ombre deco mesh into long strips, about 5-8 inches long. Now this part is very important so listen closely, THEY DO NOT HAVE TO BE PERFECT. Don’t worry about measuring them or making them even, just cut and go. You won’t notice at all once they are rolled up burrito style. Cut both rolls of the ombre deco mesh, and about half a roll of the green deco mesh. The green just gives a pop of color throughout.
Next, cut a bunch of each color ribbon, slightly longer than the width of the mesh, so the ends hang off once they are rolled up.
Dove tail the ends of the ribbon to give it that ‘high-end’ look. Fold the ribbon in half, and cut a diagonal slit pointing down towards the end to get the dove tail like the picture below.
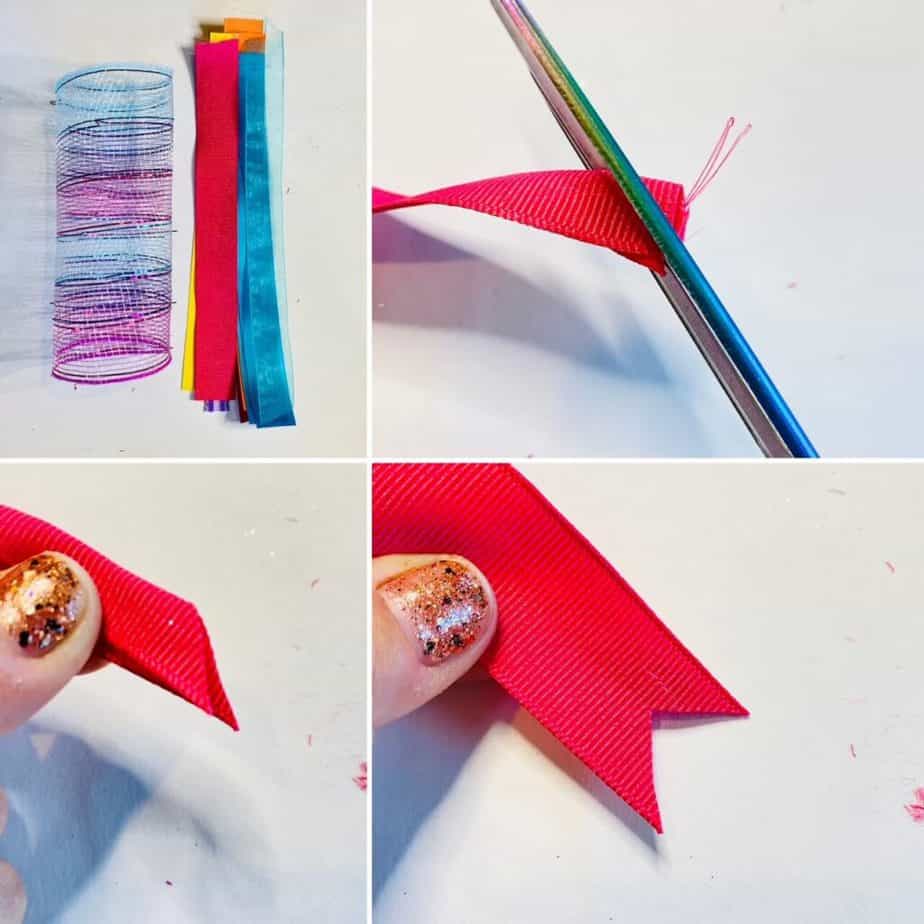
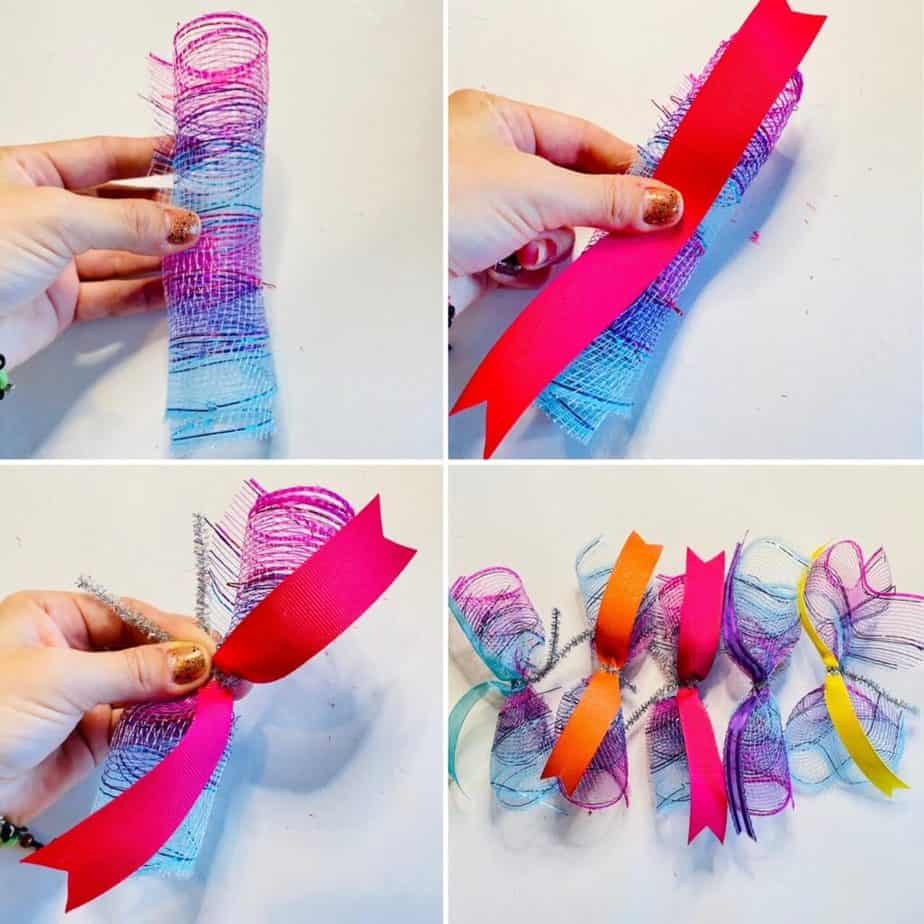
Now let’s make a bunch of rainbow deco mesh burritos.
Cut 10-15 pipe cleaners into 3rds.
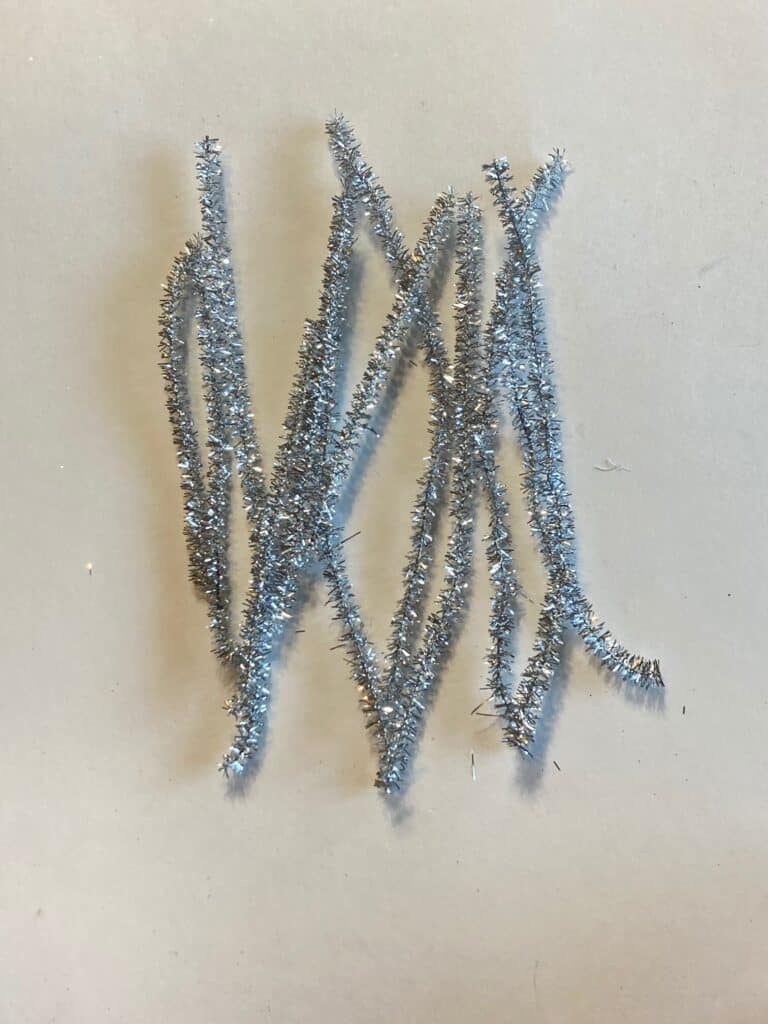
Roll the deco mesh strips up loosely, place a ribbon strip on top, wrap a pipe cleaner piece around it, and twist slightly to secure. Don’t over twist, you will need the leftover pipe cleaner to attach the deco mesh roll to the plastic witch hat frame. Repeat the process until all of the mesh and ribbon is wrapped into bunches. I didn’t count, but I’d say I had about 30 or so deco mesh bunches.
Starting at one end, secure a deco mesh bundle to the plastic wreath frame with the remainder of the pipe cleaner. Continue to add burrito bunches to the frame, alternating between the outer plastic rim, and the middle plastic rim. Every 5th bundle or so, add in a green bunch to get that pop of color.
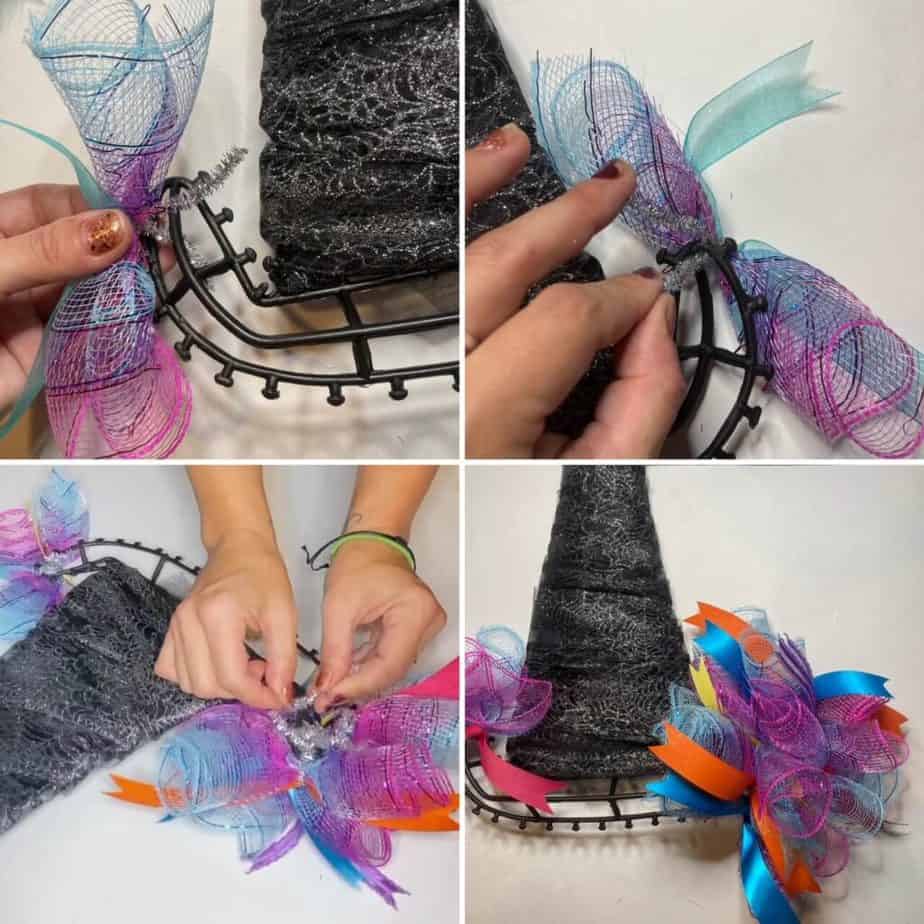
When you have about a third of the Witch Hat frame covered with the deco mesh bundles, stop and begin adding them from the other side of the Witch Hat. Continue to do the same thing until the other end is about a third covered, leaving only the middle portion. I did it this way to make sure that I had enough deco mesh bunches to cover the entire witch hat. I also felt like I was getting more even coverage this way.
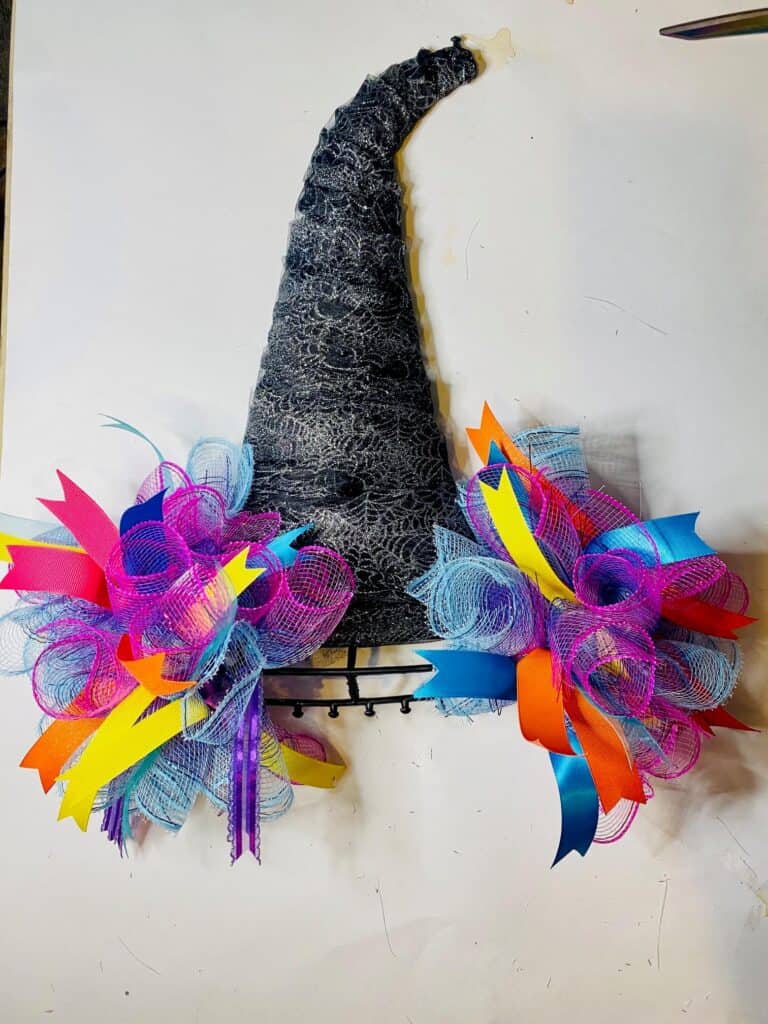
Then begin to fill in the middle until the entire bottom of the Witch Hat is full.
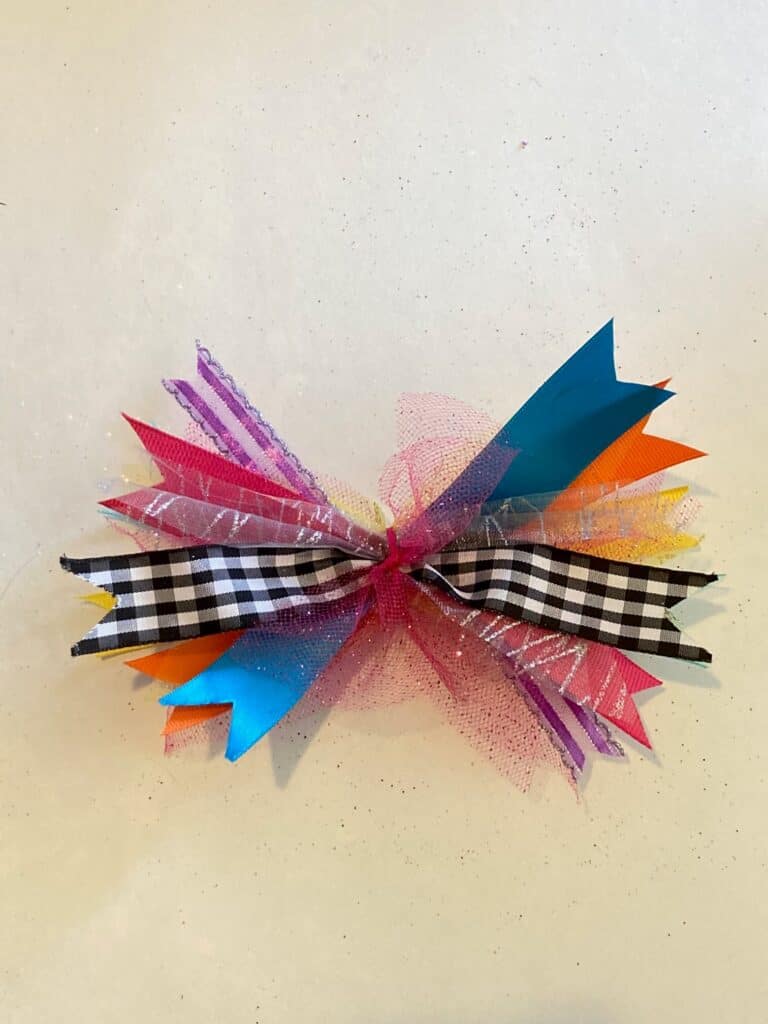
Almost done! We’re in the home stretch, it’s time to make the Witches bow for the top of the wreath hat. Cut a strip of each color ribbon about 6-7 inches long. I also added in a piece of buffalo check and some pink and yellow tulle that I had leftover from a previous craft, but you can use whatever you happen to have on hand. Dove tail the ends like we did before, and lay the pieces in an overlapping ‘X’ shape, and user a small piece of string to tie around the center. Fluff out the ribbon ends until it looks all pretty.
Glue the rainBow to the tip top of the Deco Mesh Witch Hat Wreath, and glue a fake jewel spider to the center.
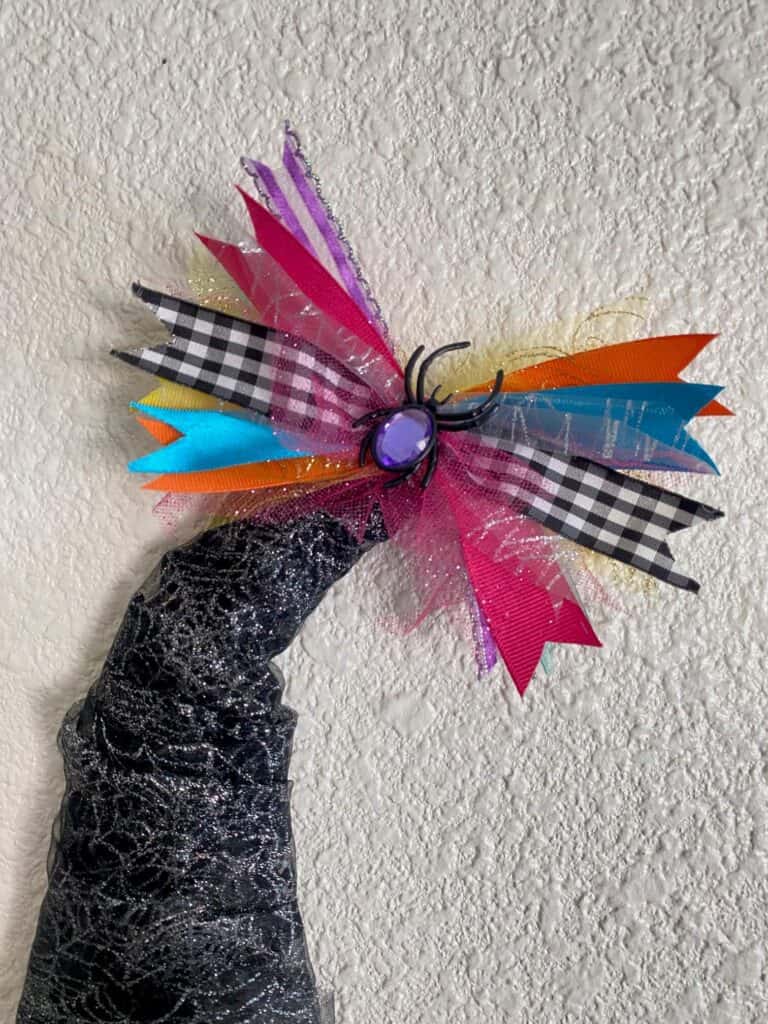
The next part is completely optional, but I always tend to go a little overboard with my crafts. If you’re like me, read on to add the Glitter Skull Pick to your Dollar Tree Deco Mesh Witch Hat!
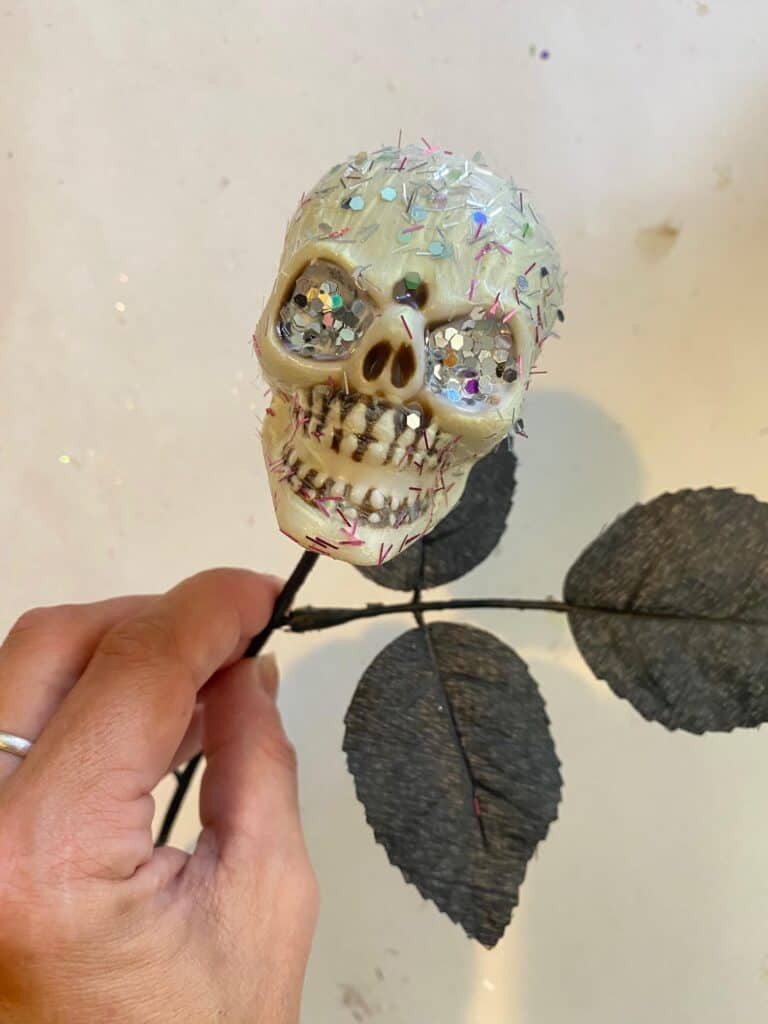
Cover the skull head with a generous layer of either Mod Podge or Glow-in-the-dark paint. Either one will do the trick (or treat :), but I just happened to have the paint on hand and thought it would be fun to use. While the paint is still wet, sprinkle as much glitter as you’d like to jazz it up. Stick the glitter skull pick into the mesh part of the wreath, and cut off the bottom of the pick if it sticks out of the bottom.
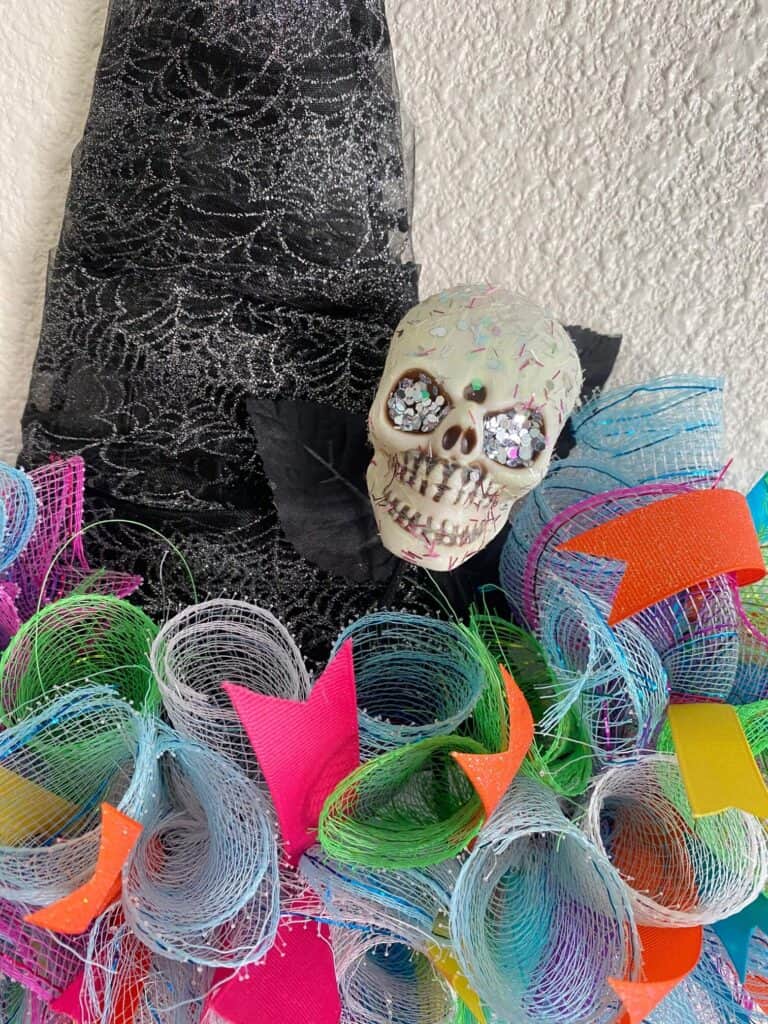
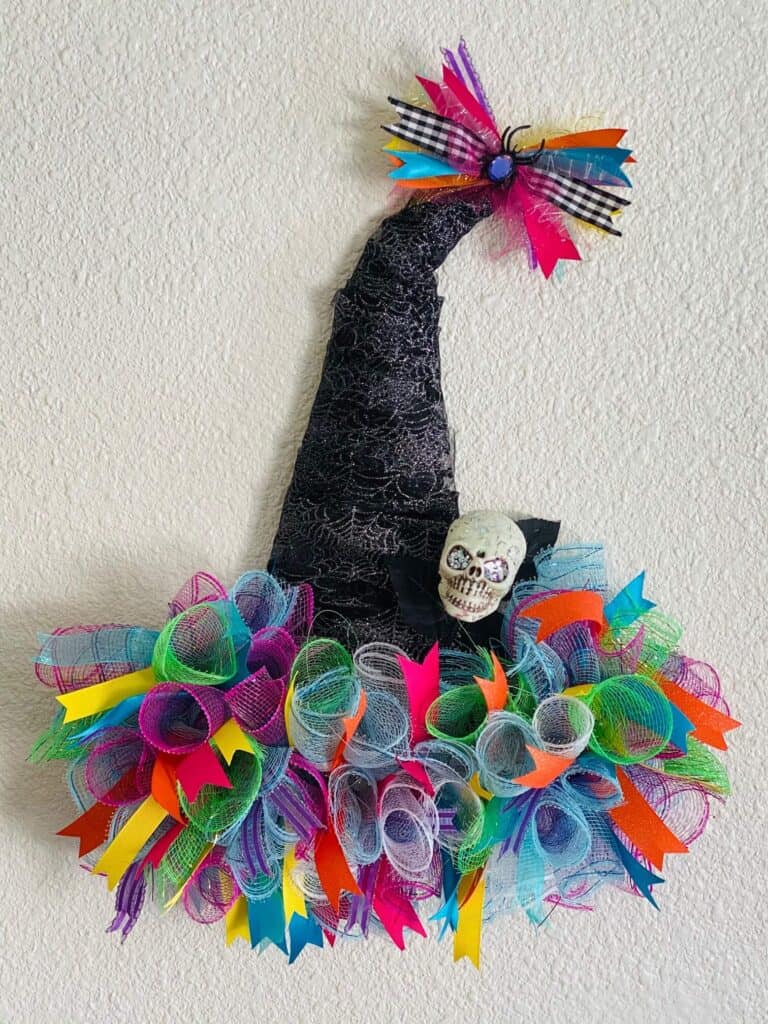
There ya have it. A fun and colorful Deco Mesh Witch Hat to add to the rest of your rainbow Halloween decor! What do ya think? Have I brought you over to the wild side yet? If not, make sure to check out our other Dollar Tree Rainbow Halloween Crafts, like these Blinged Out Coffins and the Rainbow Pumpkin Topiary to name a few!
Make sure to join us over in the Craftspiration Facebook group so we can see your Rainbow creations come to life. Don’t forget to tag #MandaPandaProjects so I don’t miss your awesome craftyness!
Until Next Time…
Stay Crafty San Diego!

Love this Whimsical Dollar Tree DIY Halloween Wreath? PIN it for later!


