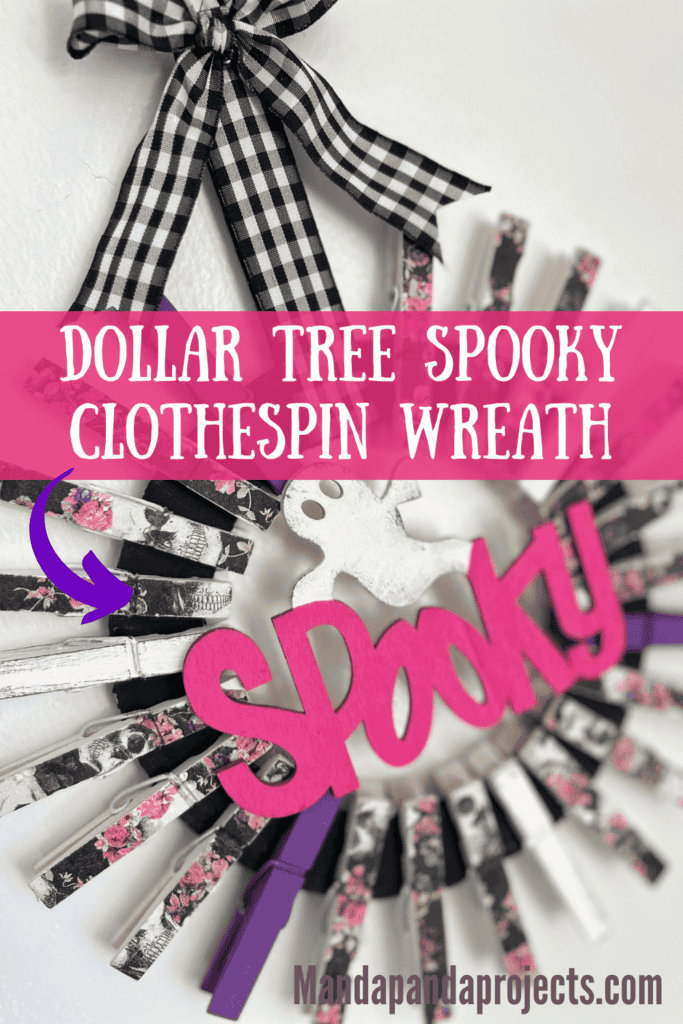
I’m bringing back the Clothespin Wreath for Halloween, but this time in a different way! And pink! Make a cute, fun and easy DIY with cardboard, a napkin, and a Dollar Tree Spooky Ghost cutout. This is a clothespin wreath like you’ve never seen before!
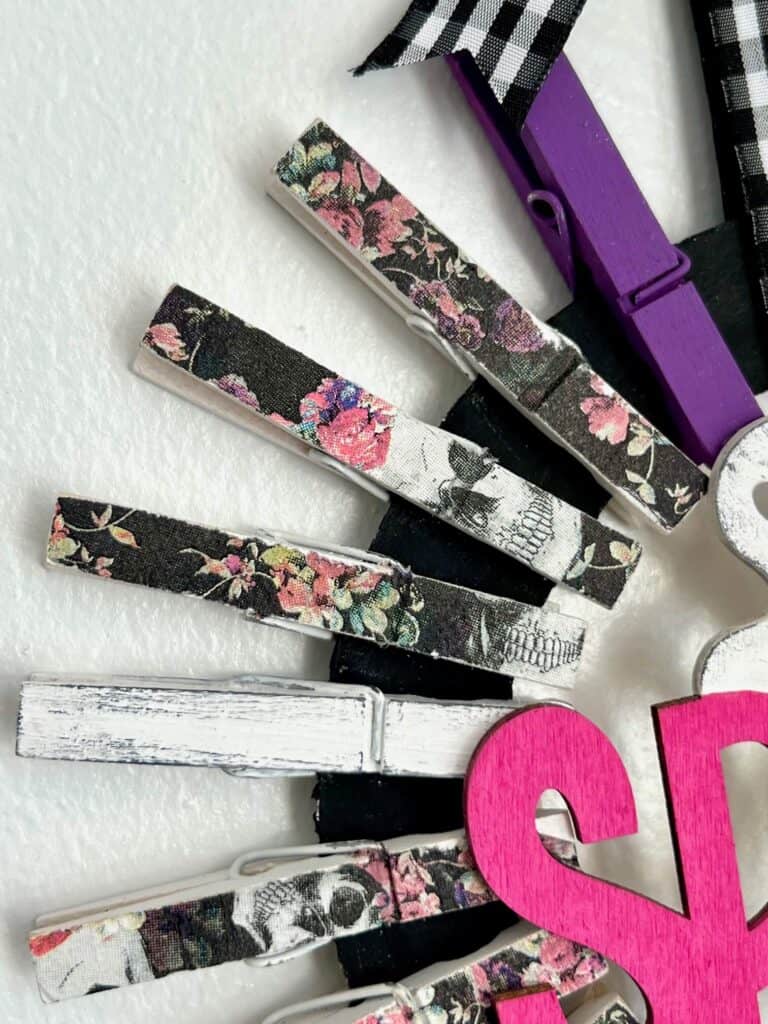
See that gorgeous floral skull napkin on the clothespins? That was one of the napkins from my Big Pack of Craftkins napkin subscription!
With Craftkins you get 18 seasonal and holiday decoupage napkins sent to you once every 3 months, so that you never have to buy entire packs of napkins for crafting ever again! Get on the waitlist for when it opens next HERE.
Clothespins wreaths were sooooo popular for sooooo long, but they kind of faded out a few years back. Well, I am reviving it this year, but in a different way…..
With cardboard! So no need to even buy a wire wreath form to make this one.

You could make this with ANY napkin and any embellishments you want. It of course doesn’t have to be pink Halloween like mine, you could even make a Fall or Christmas clothespin wreath too.
But if you DO love the pink Halloween theme like me, be sure to check out the Dollar Tree BOO Ghost I made to go along with this one!
This post may contain affiliate links for your convenience (which means if you make a purchase after clicking a link I will earn a small commission but it won’t cost you a cent more!)
Supplies Needed to Make a Spooky Halloween Clothespin Wreath
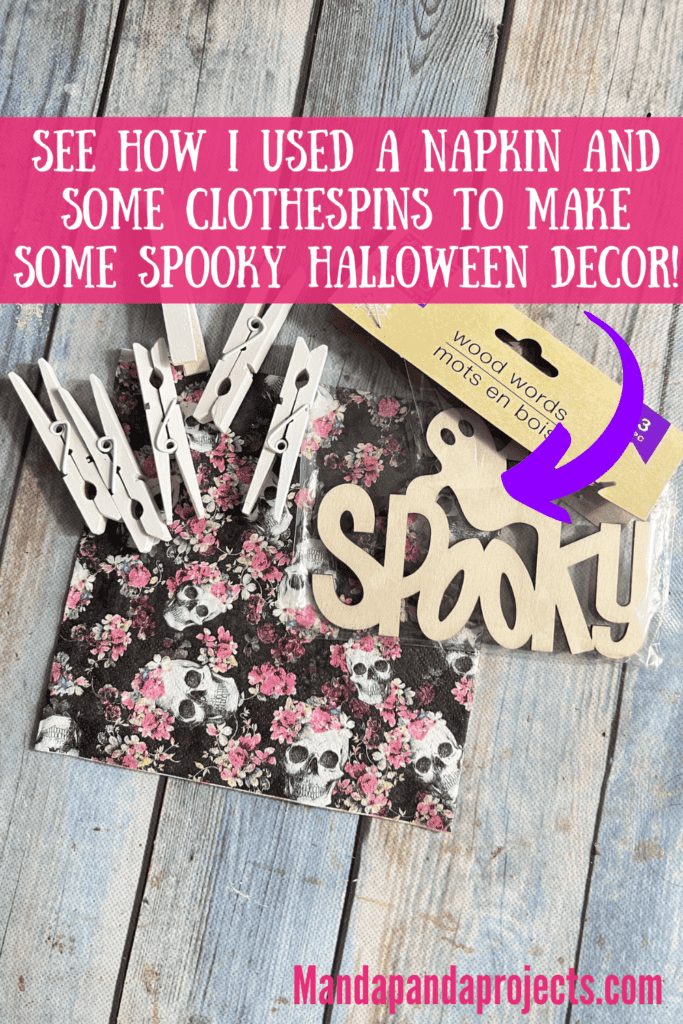
- 24 Clothespins
- Cardboard
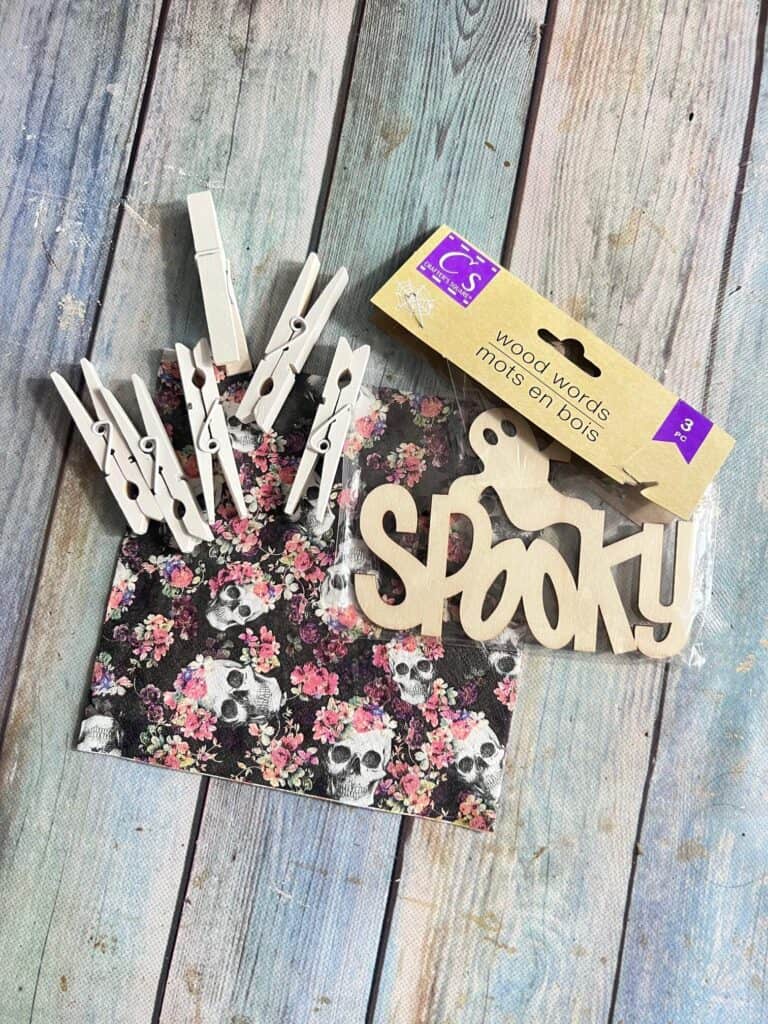
- Dollar Tree ‘Spooky” ghost cutout
- Floral Skull Napkin
- Buffalo check ribbon
- Black bakers twine
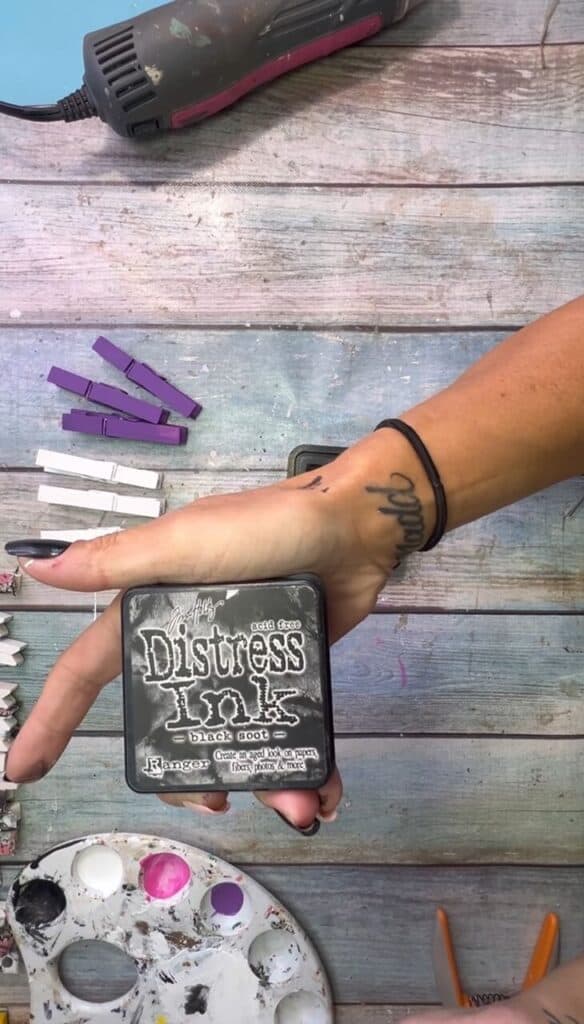
- Tim Holtz Distressed Ink
- Paint: Black, White, Pink, Purple
- Mod Podge
- Hot glue gun
How to Make a Spooky Halloween Clothespin Napkin Wreath
I made this Halloween Clothespin Wreath on video. So you can WATCH the tutorial by clicking below.
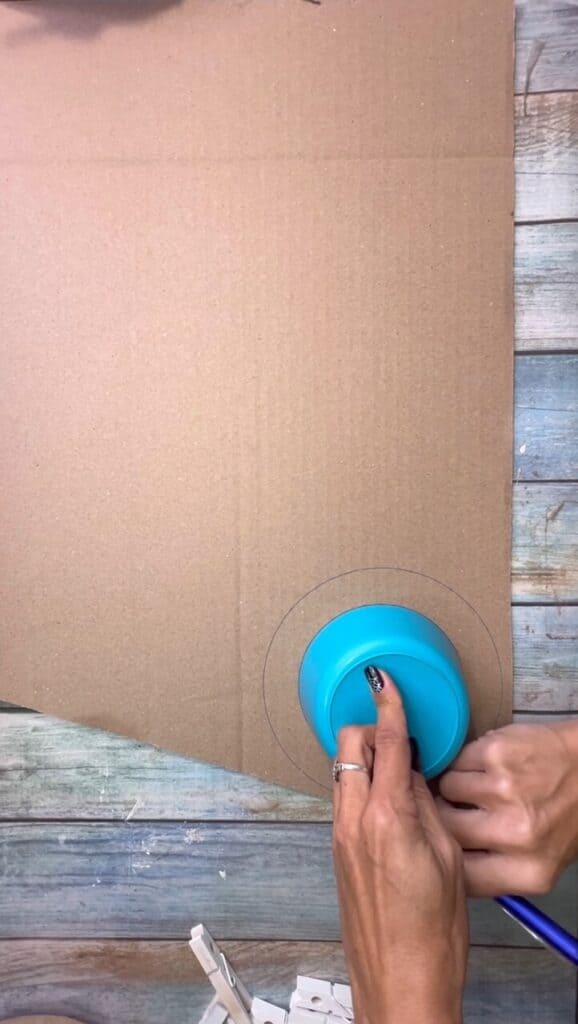
First thing I did was trace two bowls onto a piece of cardboard. One just a bit bigger than the other, to make a donut shape. The donut is about 2 inches thick.
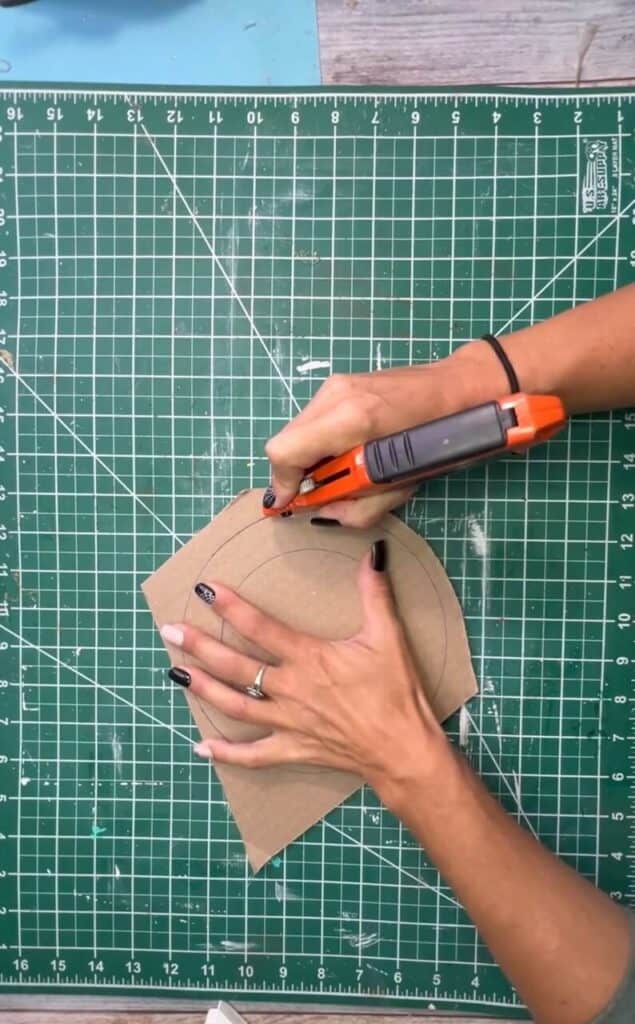
Next, I cut the donut shape out with a good box cutter.
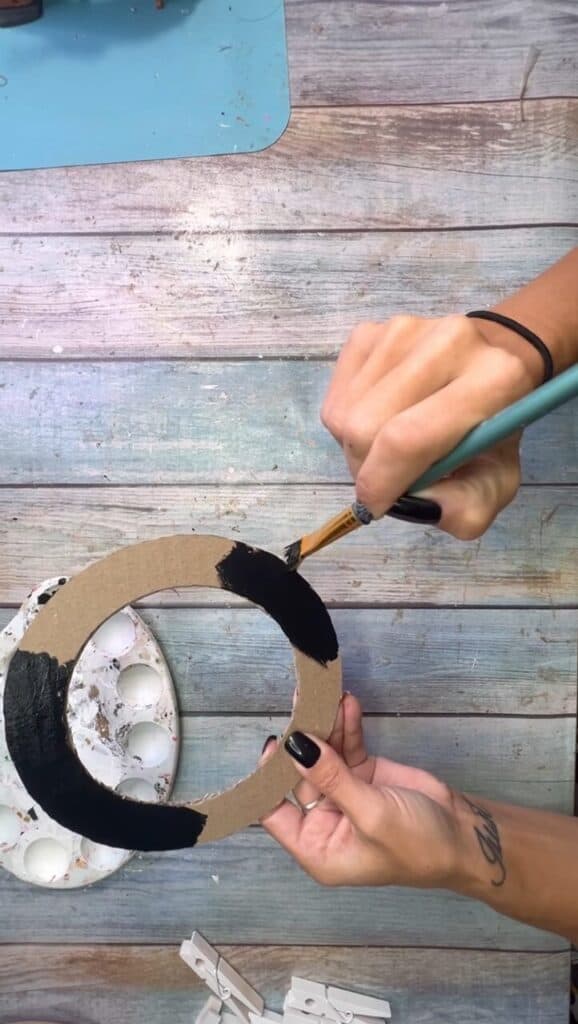
Then, I painted the entire cardboard donut all black.
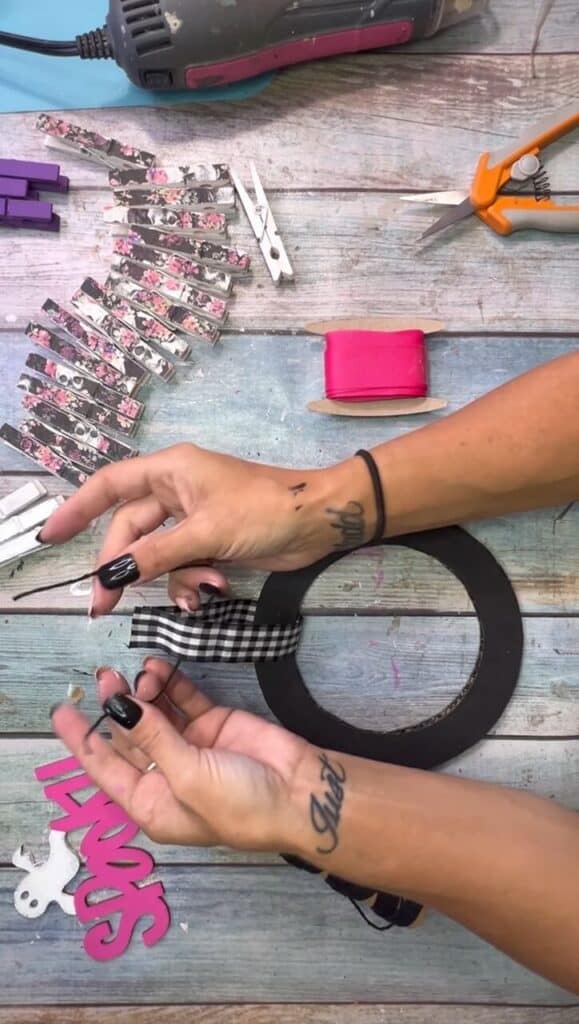
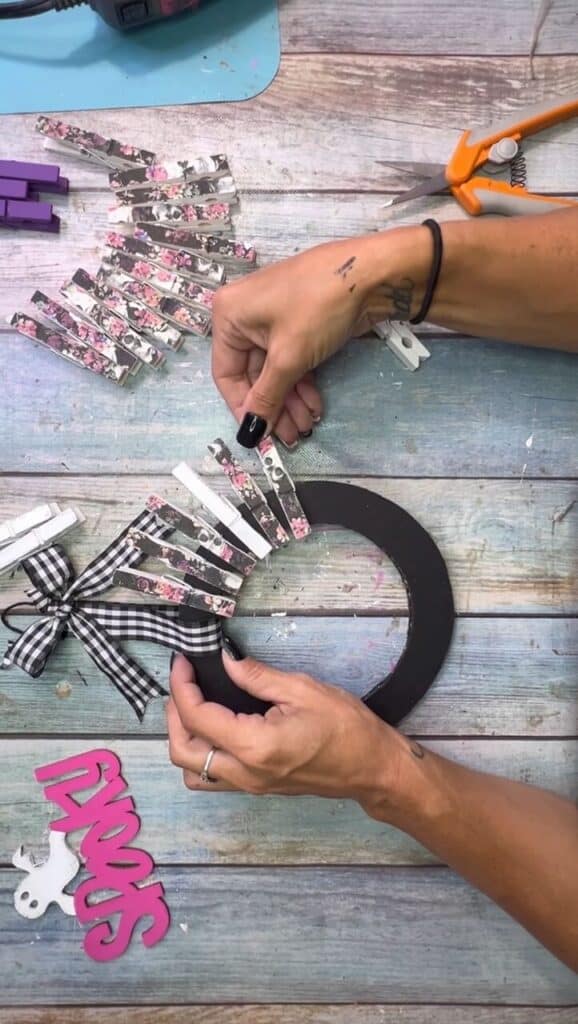
Now for the clothespins. I took my napkin and separated the plys to get it down to one ply.
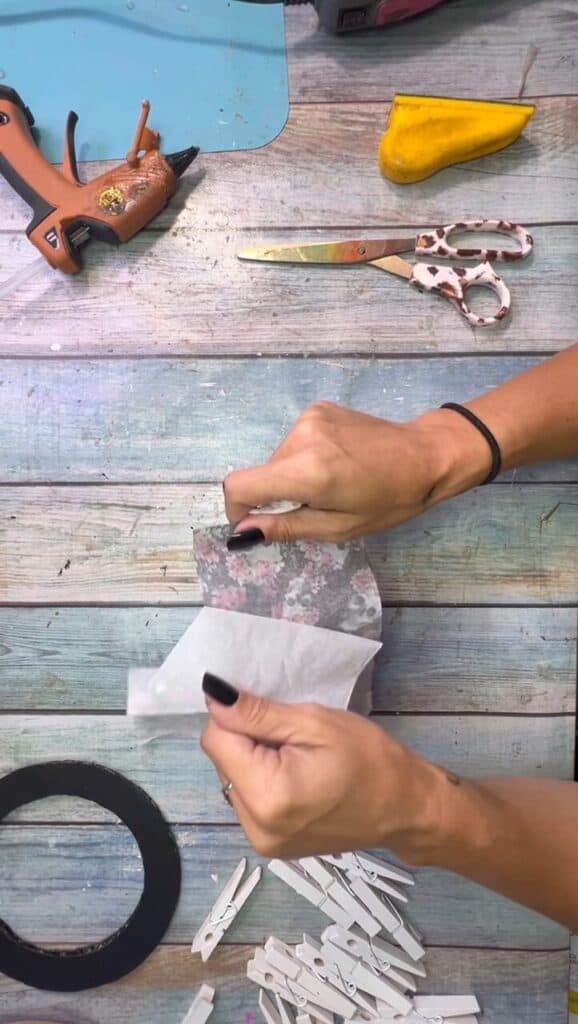
I then used Mod Podge to decoupage the napkin to the top of the clothespins. I did a total of 18 decoupaged clothespins. The fastest way was to stick them all down to the napkin next to each other in a row, and then use scissors and cut them apart, rather them do them one at a time.
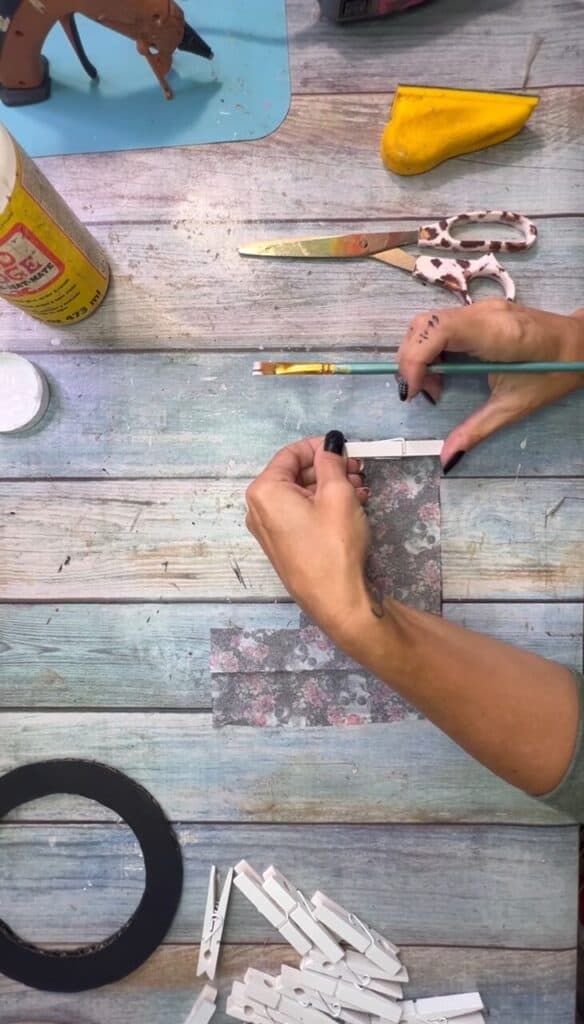
I used my gator sander to sand all the excess napkin from the clothespins.
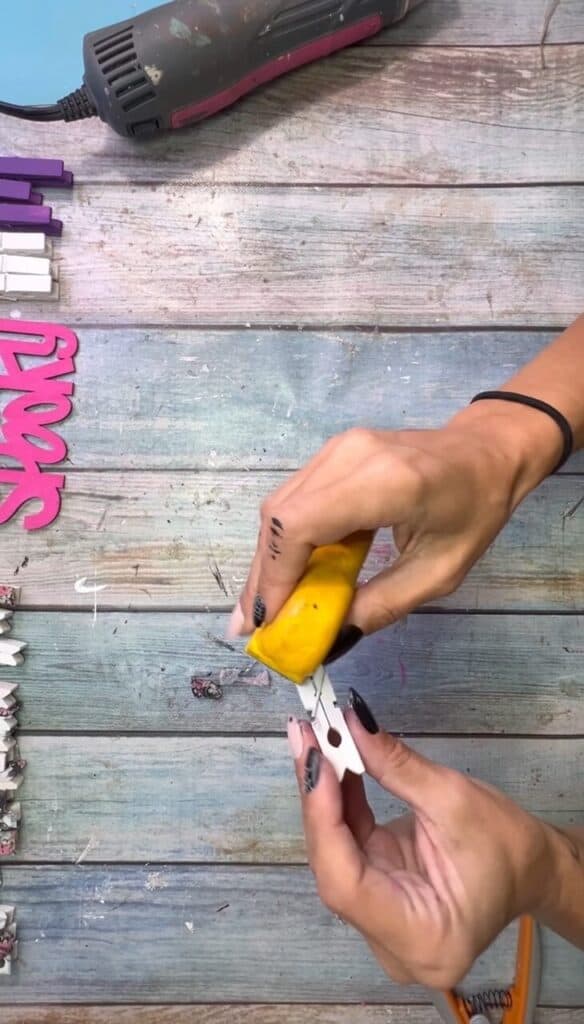
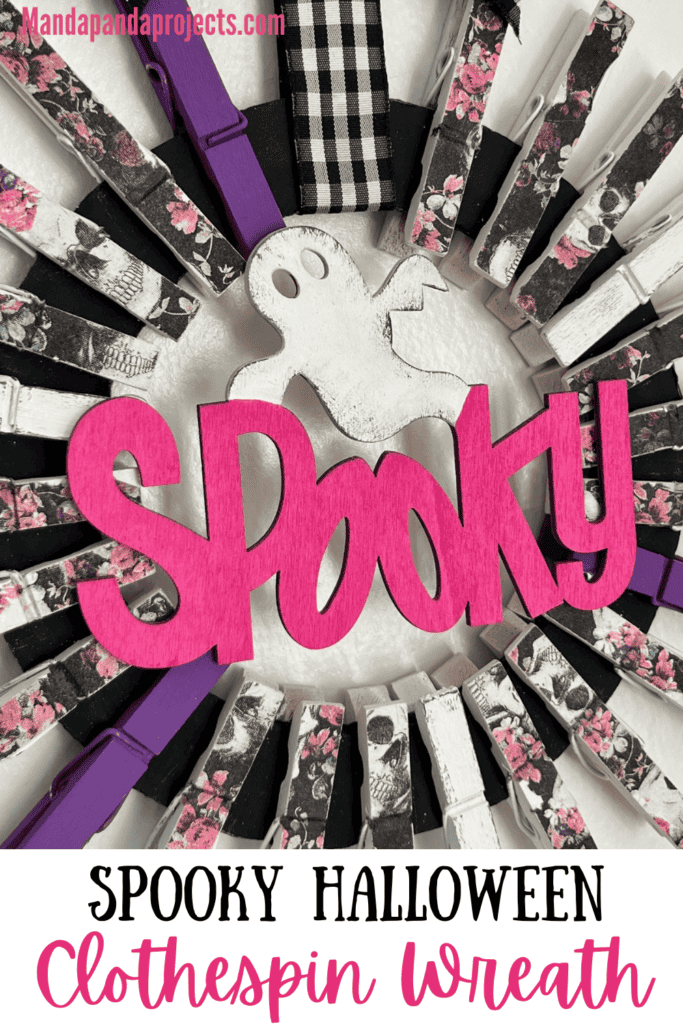
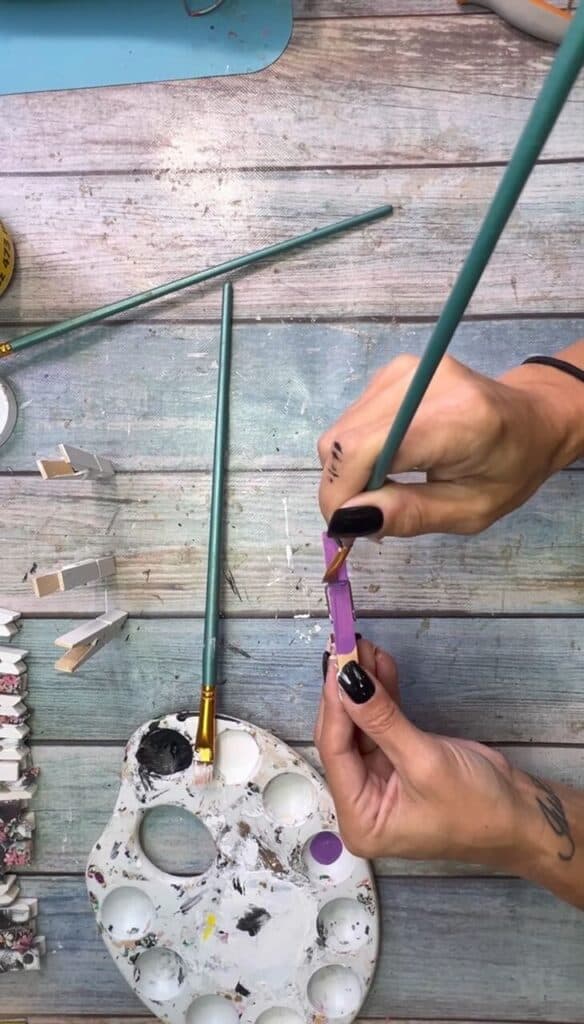
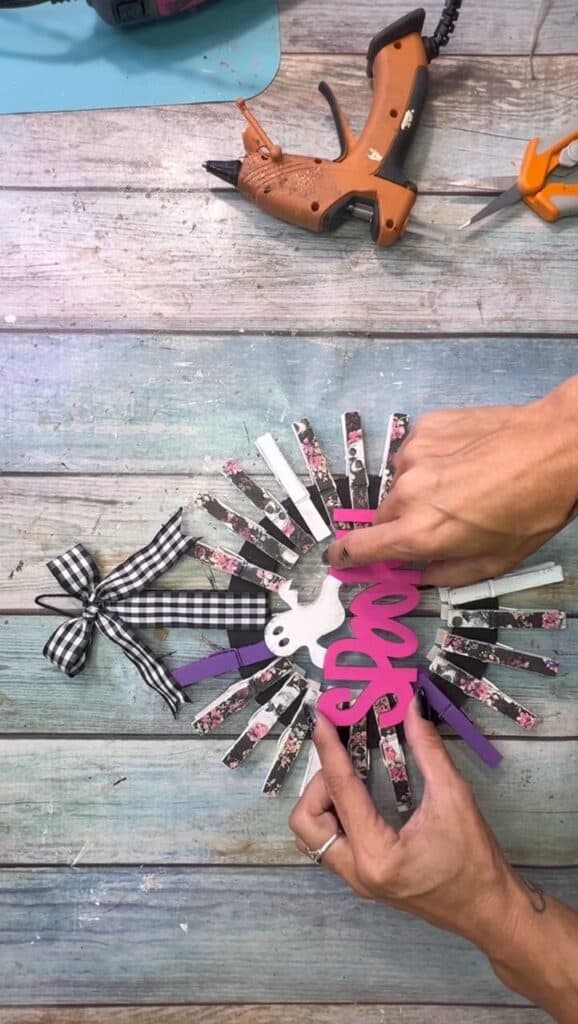
I wanted to add a bit more color in and pull the purple from the napkins, so I painted 3 clothespins purple.
I also used 3 white clothespins, but I had them spray painted and left over from a previous project, so I didn’t have to paint them for this project.
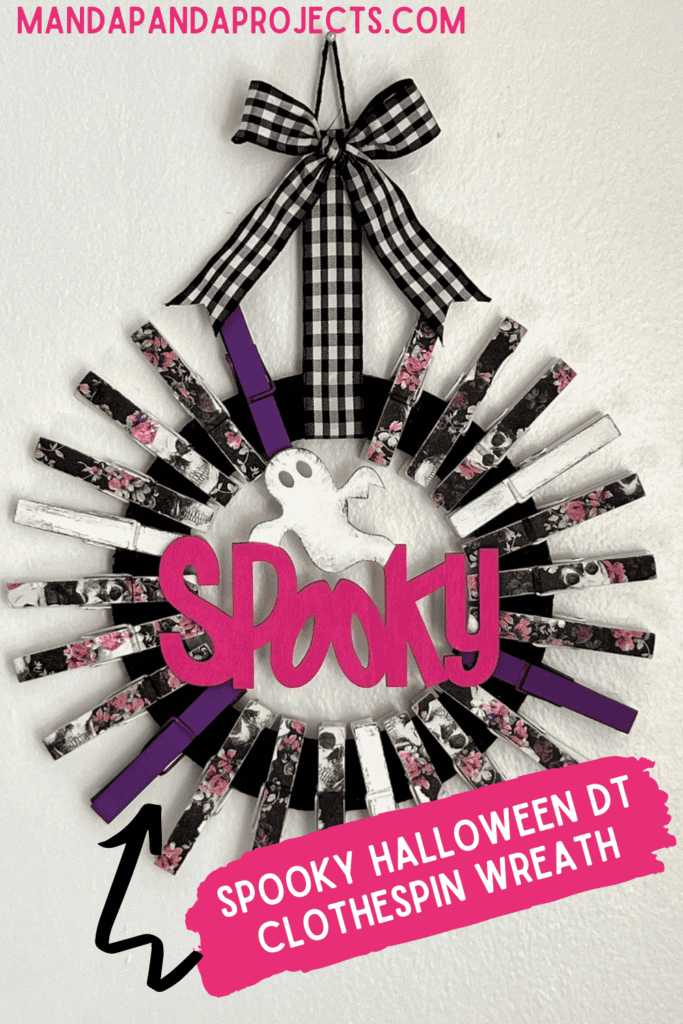
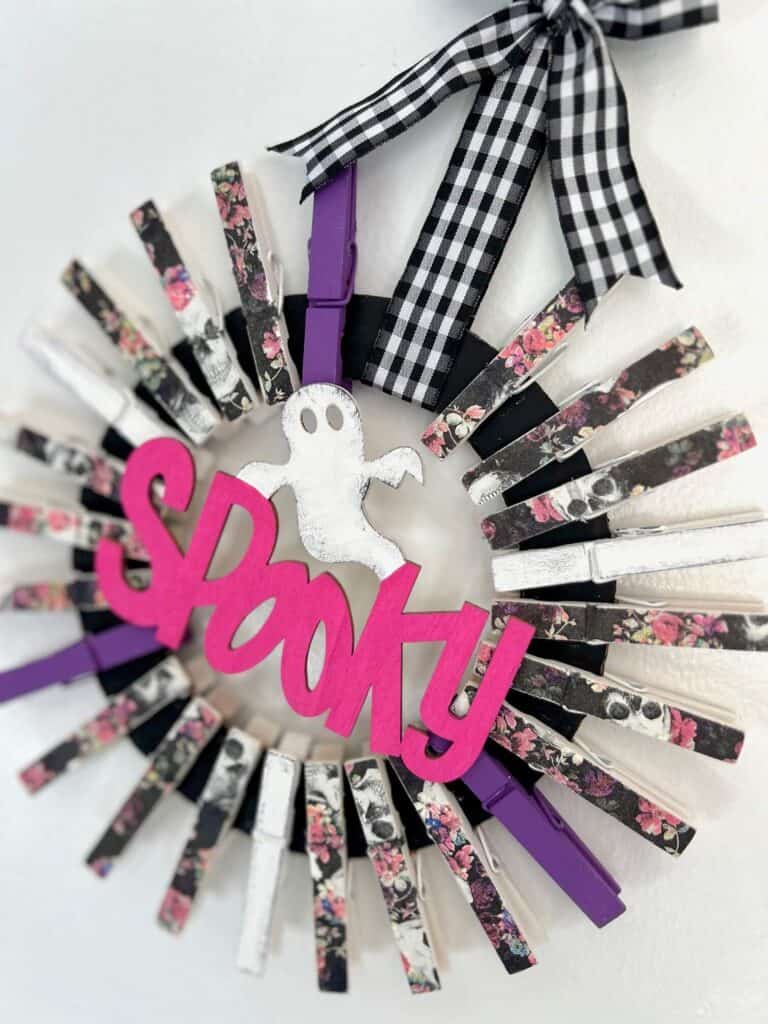
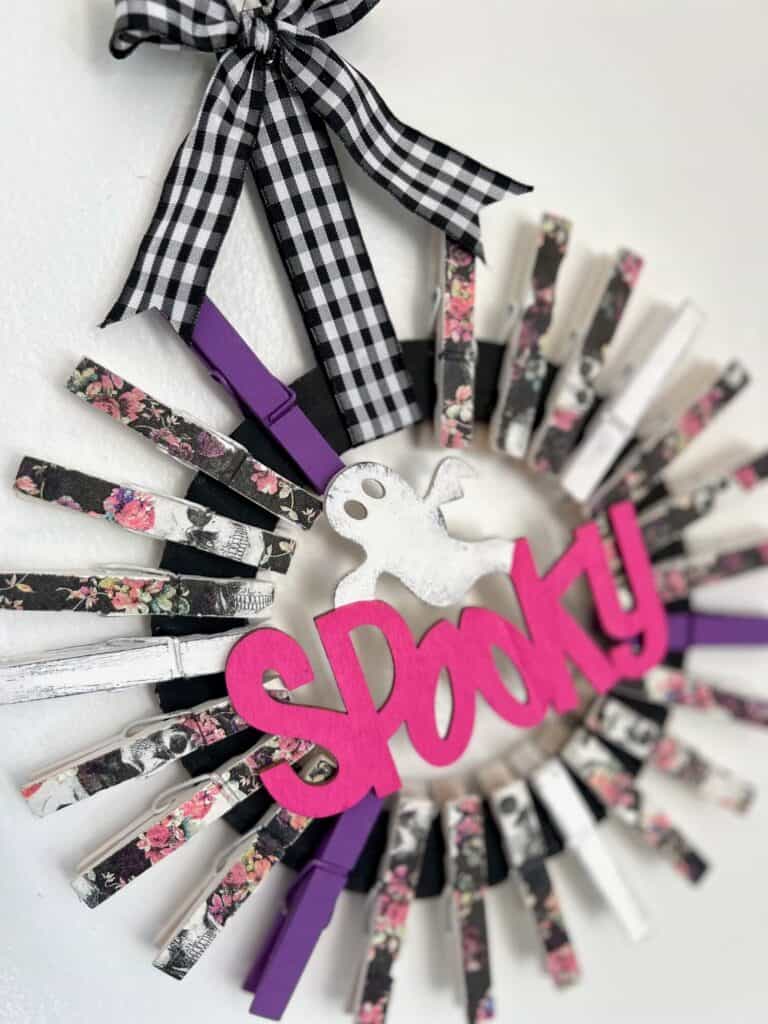
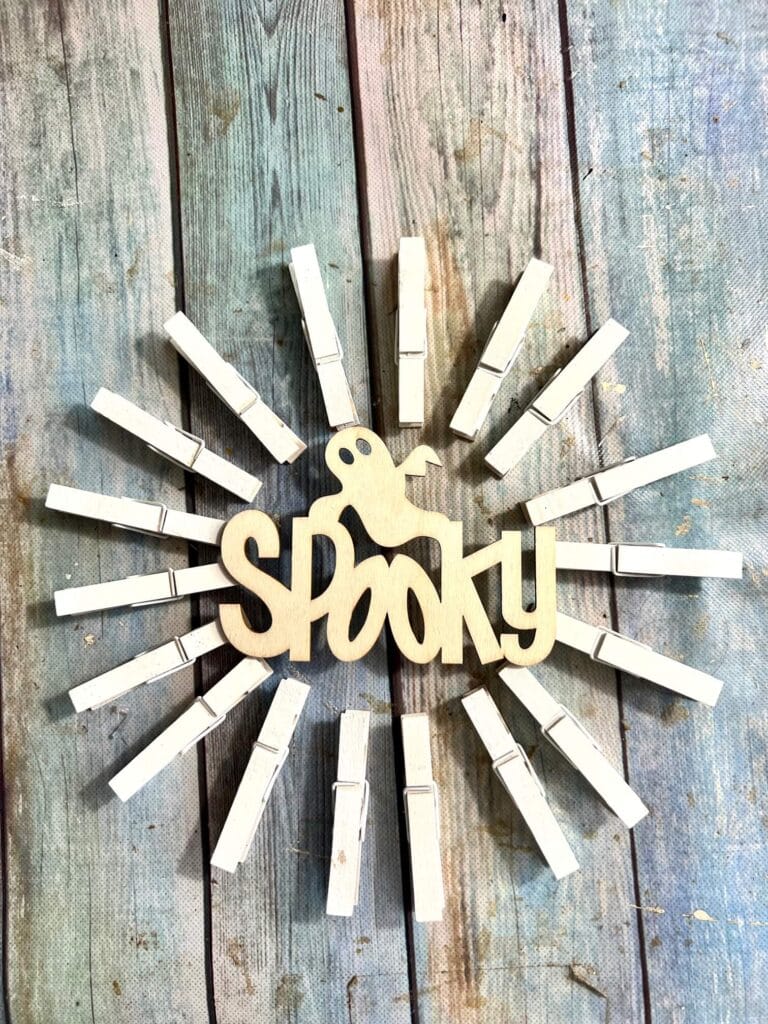
For the Dollar Tree Spooky Ghost cutout, I painted the ghost white and the “Spooky” pink (color is Apple Barrel “Fruit Punch” mixed with “Pure pink”).
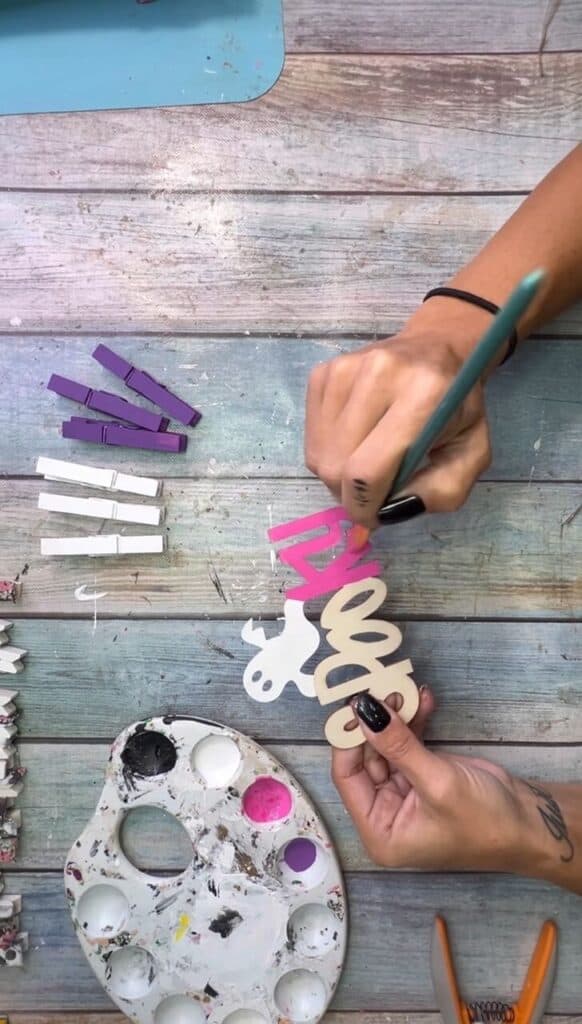
The white on the clothespins and the ghost was TOO white, so I distressed it a bit with my Tim Holtz Distressed Ink by rubbing it lightly on the edges.
Now for the hanger, I looped a piece of buffalo check ribbon around the top of the donut, and then glued the edges together.
I realized I wouldn’t be able to actually hang it this way, so I then added a small black bakers twine loop to the top, and that worked out great!
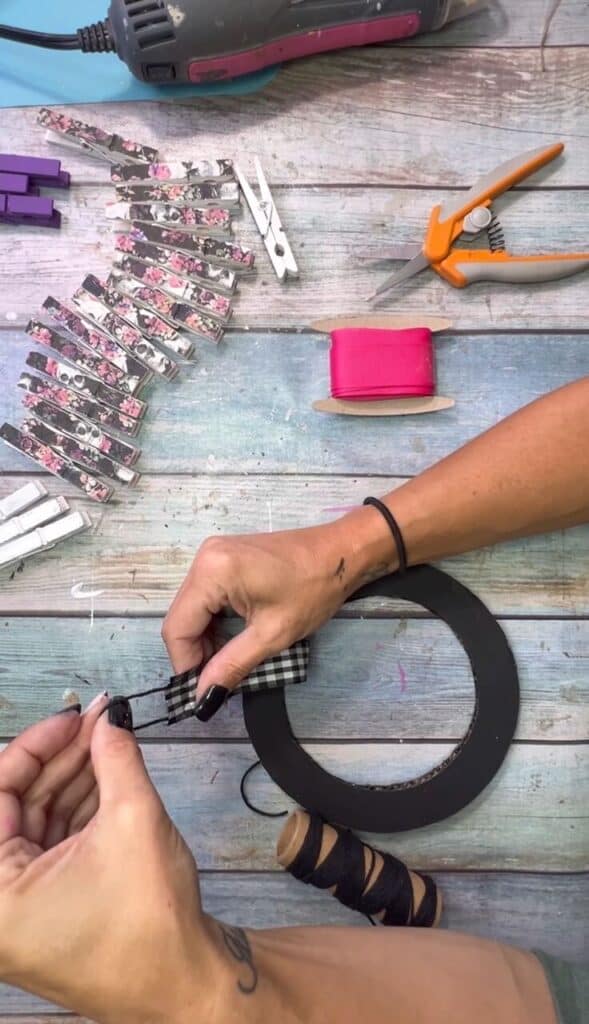
To make it all pretty I made a simple buffalo check bow and glued that to the top of the hanger.

Let’s put it all together! I started clipping the clothespins around the donut in the following pattern: 3 Decoupaged napkin, 1 white, 3 decoupaged napkin, 1 purple, and then repeat.
I put on the finishing touch by gluing the Spooky Ghost to the front and center of the clothespin wreath.
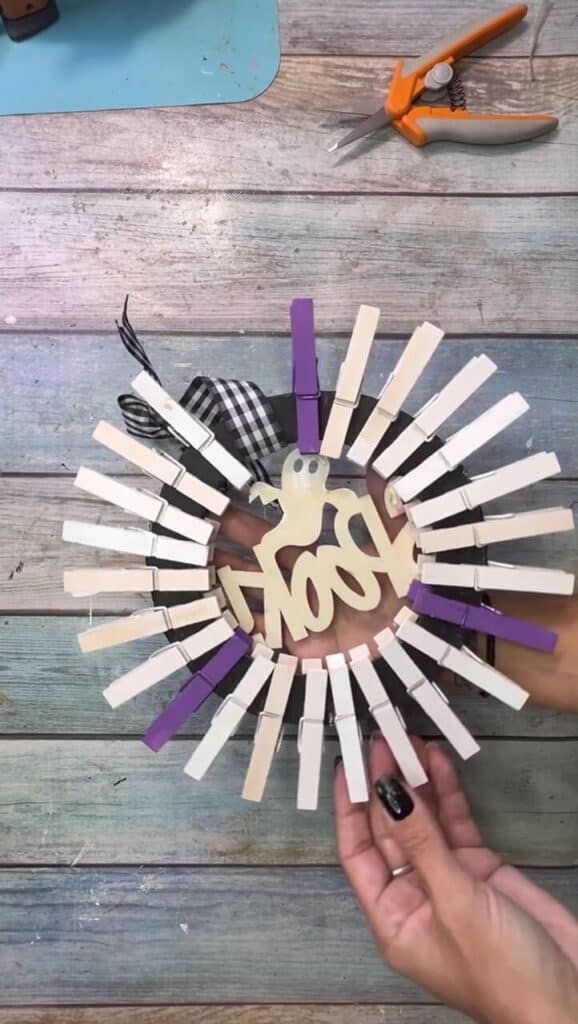
Here’s what it looks like from the back.
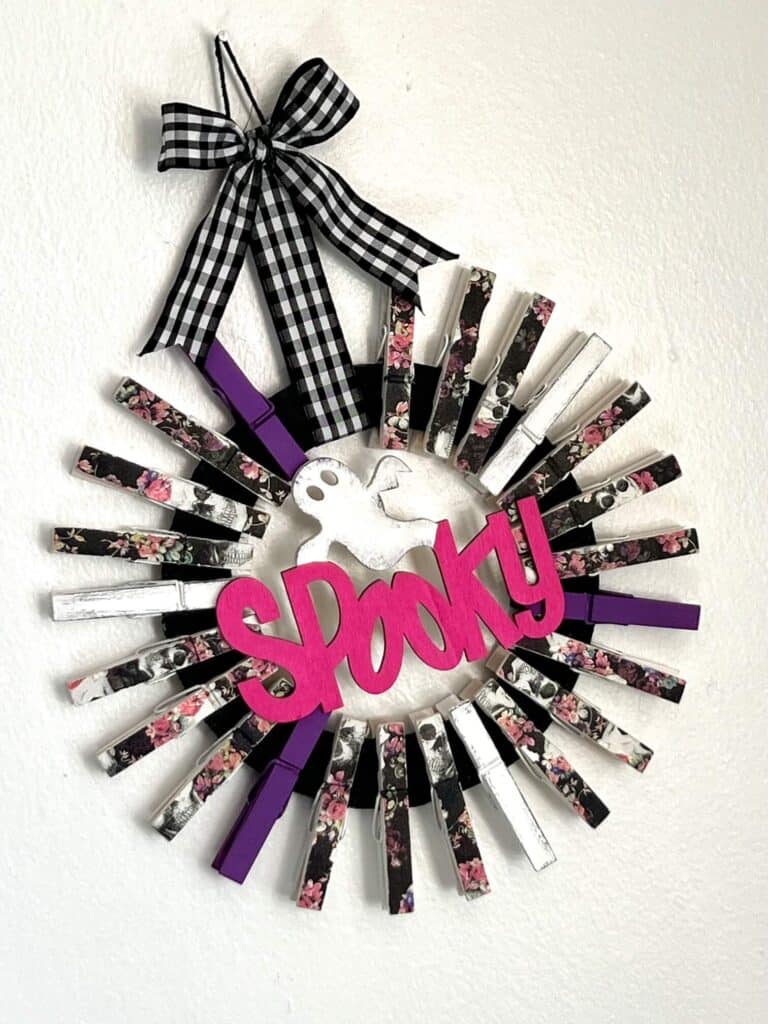
Here she is in all her glory! AHHH Oh em gee I am so in LOVE with this one! It looks so fab with my Dollar Tree BOO Ghost I made too.
This floral skull napkin from my Big Pack of Craftkins is just perfect for this clothespin wreath project!
And the Dollar Tree supplies for the WIN!

Are you going to make a Spooky Halloween Clothespin Napkin Wreath? If you do, I’d love to see it! Pop on over to our free Craftspiration Facebook group, and join in on the fun by posting a pic of your Tiered Trays, DIY’s and crafts. I just love to see all your creative and crafty creations.
If you’ve got a million projects on your crafting ‘to-do’ list like I do, than you need my FREE Craft Project Planner so you can plan to make *all the things*! When you sign up for the craft planner, I’ll also send you lot’s of fun, easy, and budget friendly ideas for you to fill it up with!
Free printable Craft Project Planner
Get organized, get inspired, and get crafting, with our free Craft Project Planner!
Until Next Time…
Stay Crafty San Diego!

Love this Spooky Halloween Clothespin Napkin Wreath? Make sure to PIN it for later!