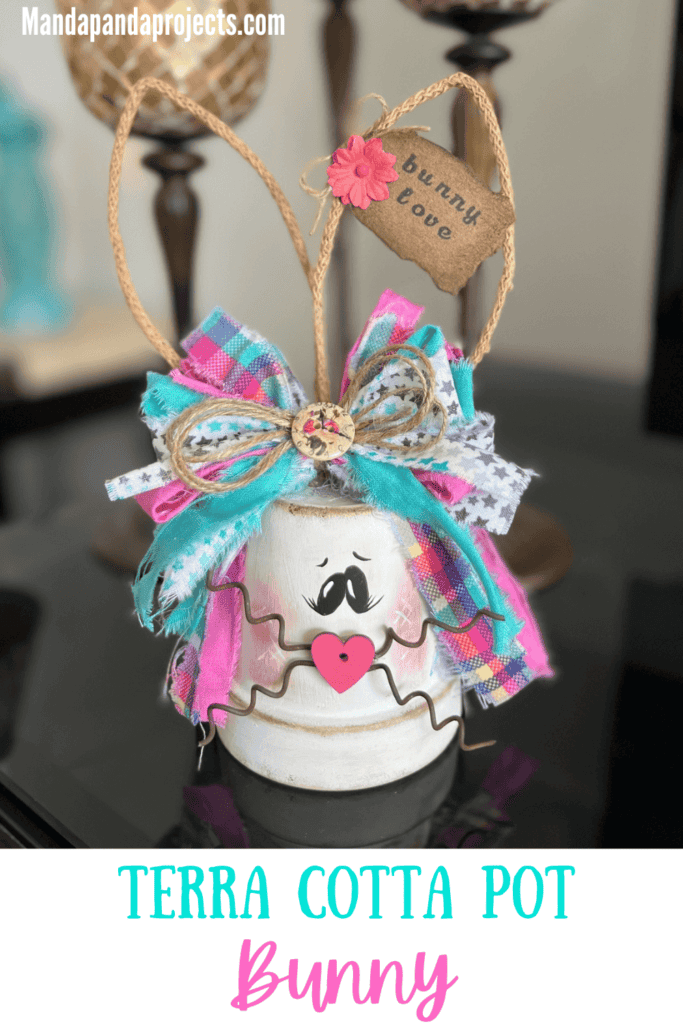
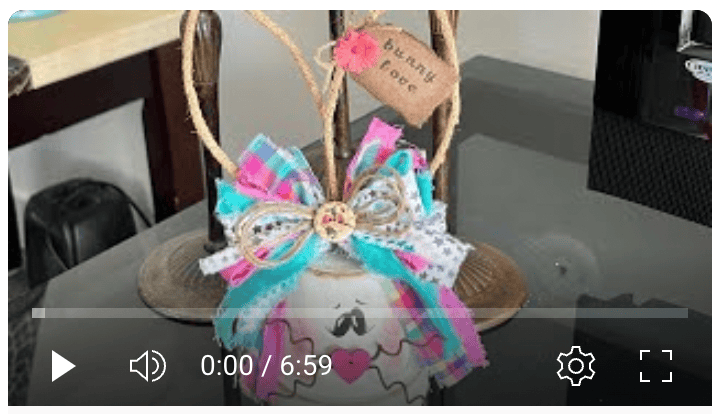
Take an ordinary terra cotta pot and turn it into a Bunny for adorable Spring and Easter decor! Hop to it, its almost Easter and Dollar Tree has all the supplies!
Bunnies Bunnies everywhere! That’s what happens when March comes around, and I’m totally here for it!
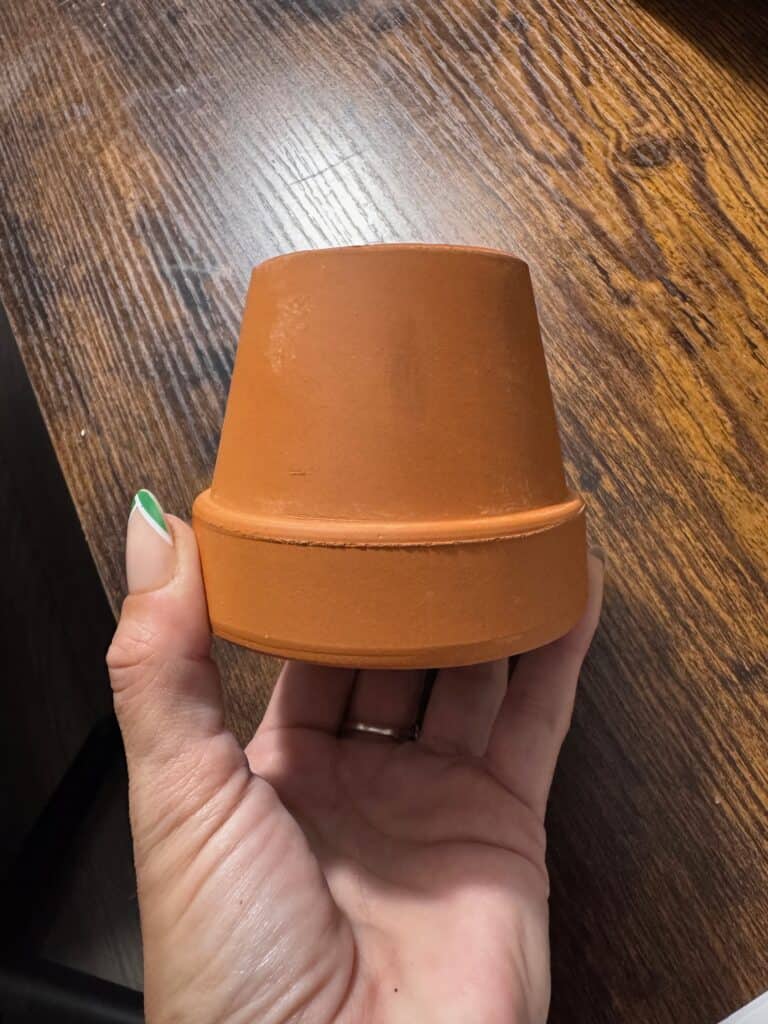
I’ve got a bazillion trillion of these Terra Cotta Pots in my stash, so of course I decided to turn one into another….BUNNY!
I went with the typical fun and vibrant spring and Easter colors for this one, but you could make her to suit your style by doing softer pastels, or even neutrals if thats more your speed.
Same bunny, different styles, still cute!
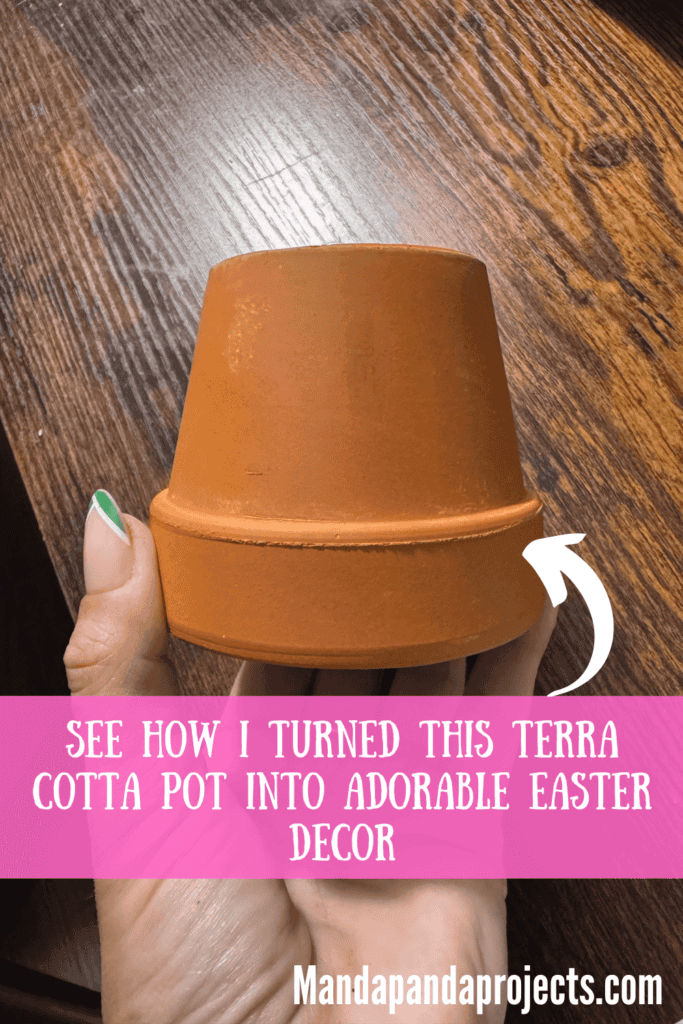
I used a 4″ Terra Cotta Pot, but you could also make mini tiered tray size bunnies with the 2″ pots, or a super big bunny for a front porch or something as well.
This post may contain affiliate links for your convenience (which means if you make a purchase after clicking a link I will earn a small commission but it won’t cost you a cent more!)
Supplies Needed to Make a Terra Cotta Pot Bunny
- 4″ Terra Cotta Pot
- Wired Jute
- Coordinating Spring color ribbon
- Vintage Button
- Small pink paper flower
- Small wood heart
- Primitive rusty wire
- Kraft Paper
- Antique Wax
- Alphabet Stamps
- Tim Holtz Distressed Ink
- Twine
- Paint: White, Black, Pink
- Hot glue gun
How to Make a Terra Cotta Pot Bunny for Easter or Spring
I made this Terra Cotta Pot Bunny on video. So you can WATCH the tutorial by clicking below.
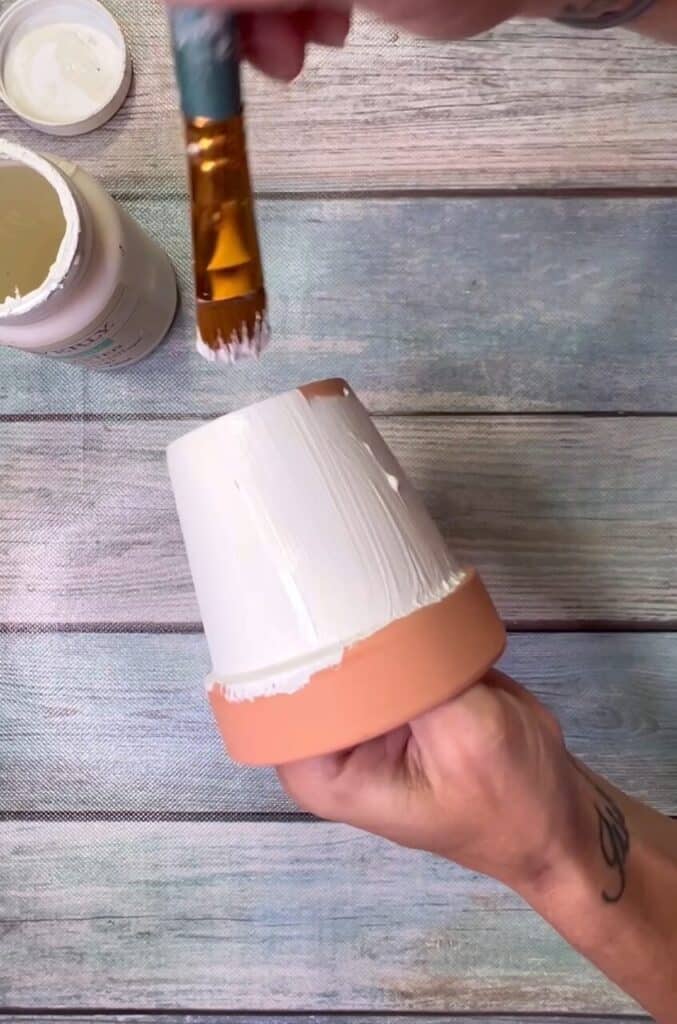
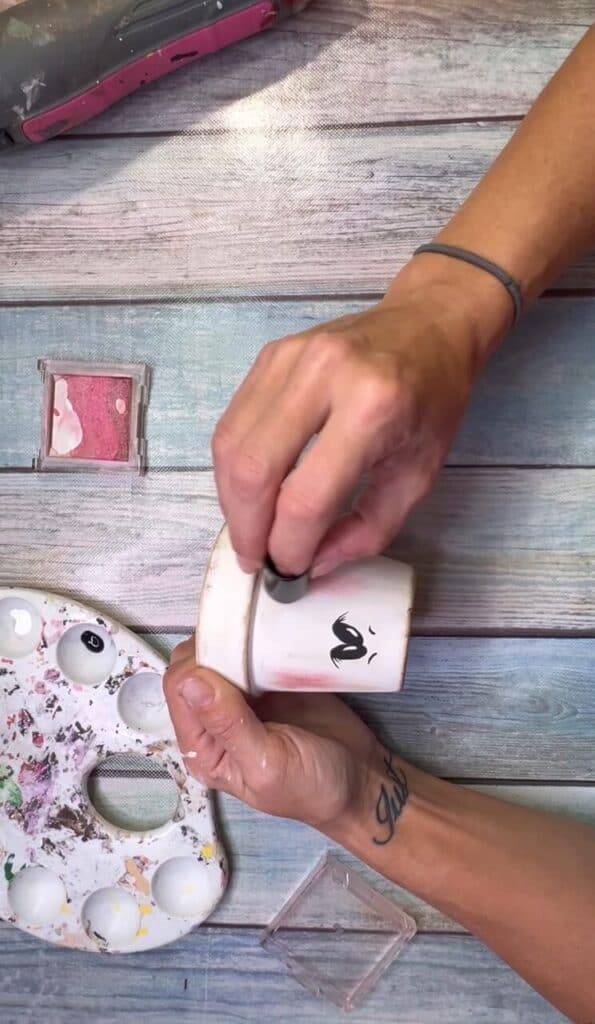
First I painted the entire terra cotta pot white.
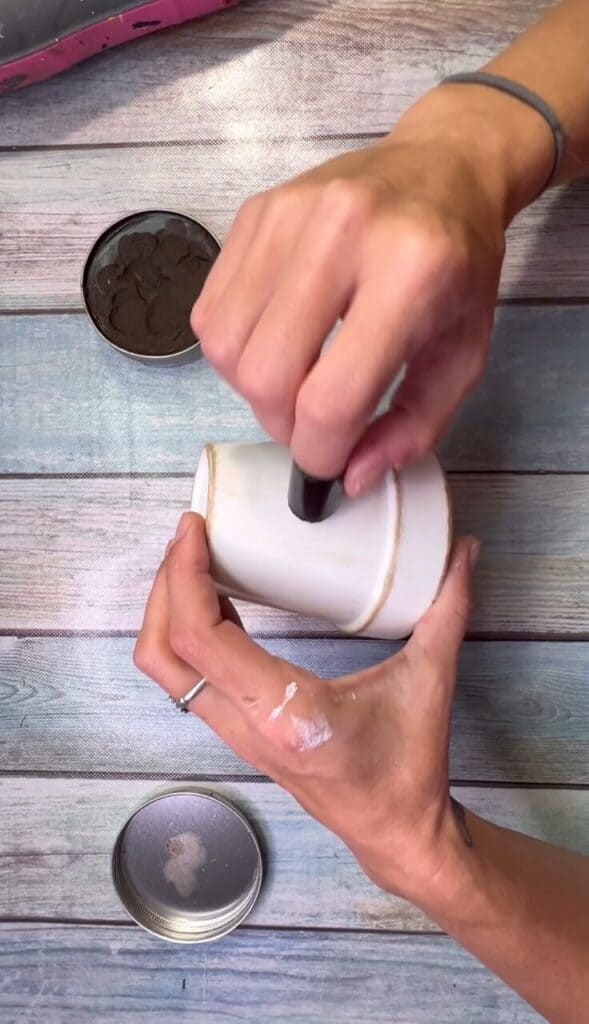
Then I used a finger dauber to grunge it up with Kilz Dark Wax. I just rubbed it around the edges, top, and bottom, as well as a bit on the main part of the pot.
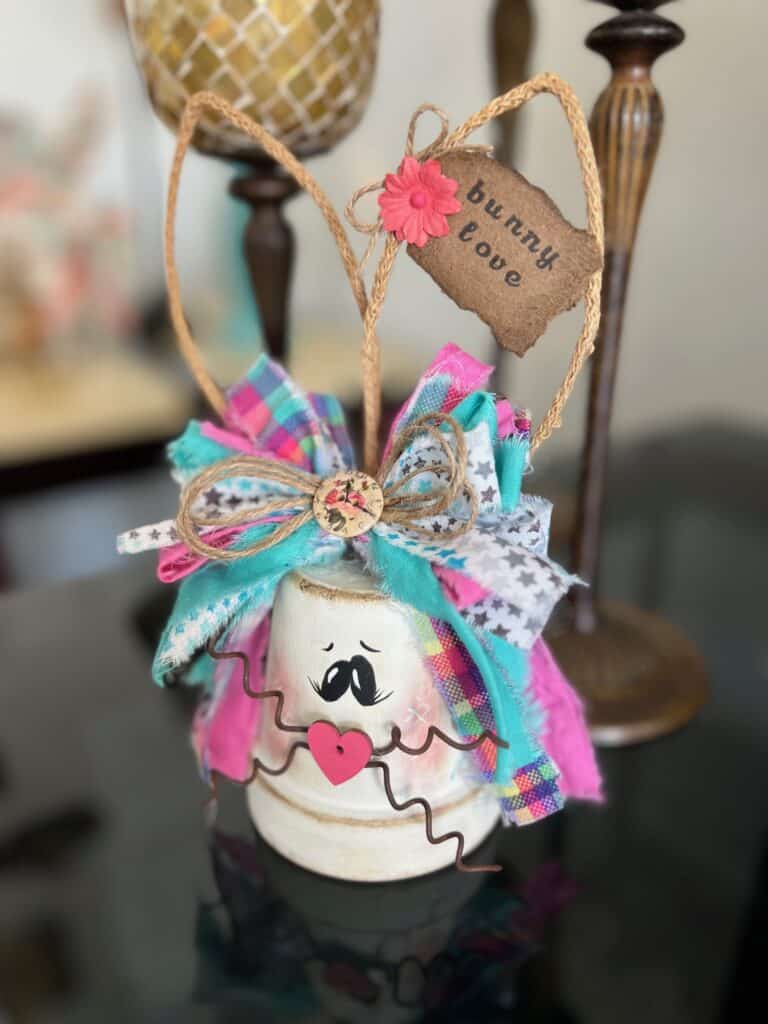
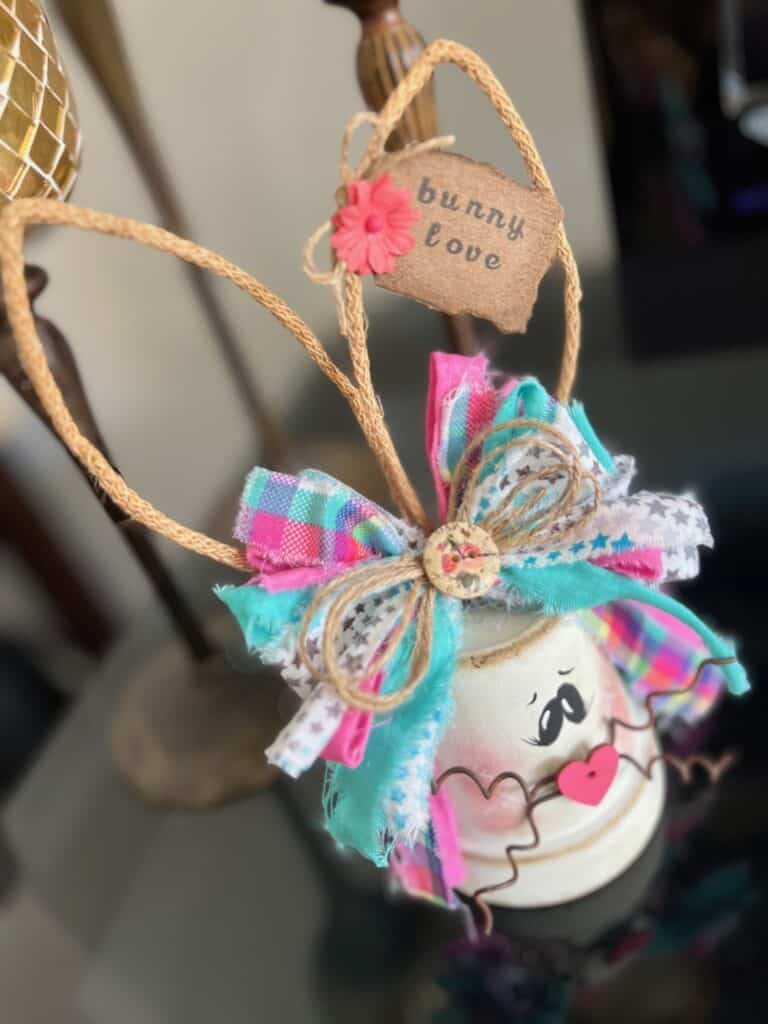
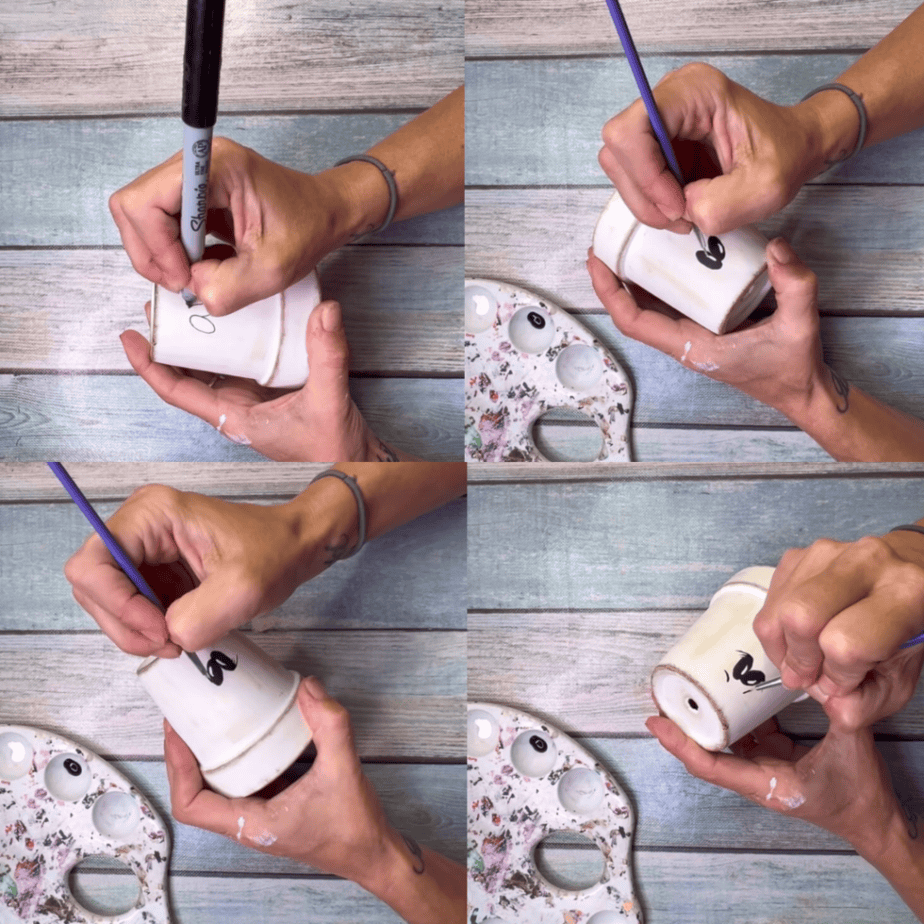
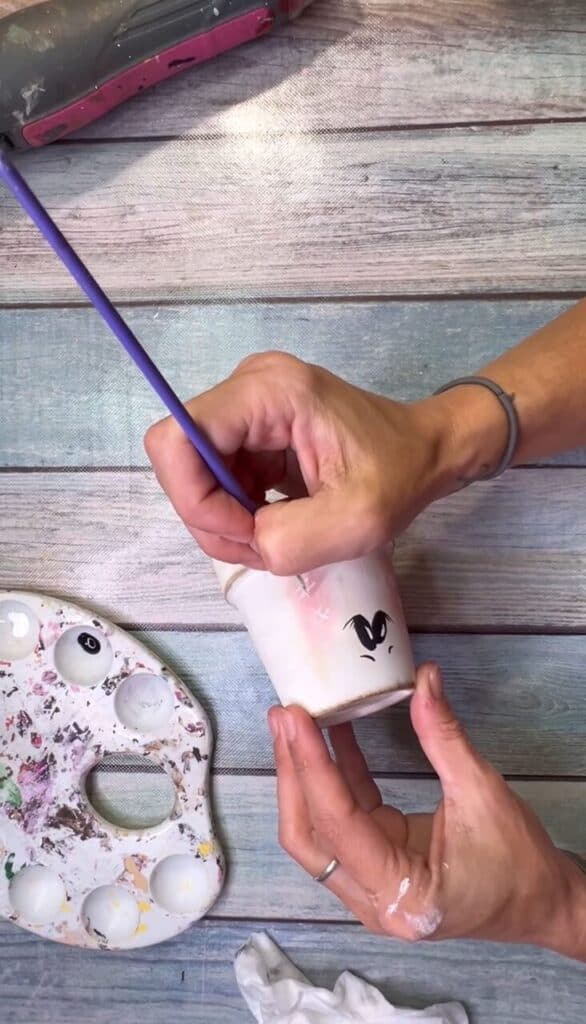
Don’t let the hand painted face intimidate you! I will break it down step by step:
- Use a fine tip Sharpie to draw the outline of the oval eyes. It’s two ovals, leaning into each other with one overlapping the other.
- Paint the eyes in black, and use a super thin paint brush to paint a small white line on the left side of each eye.
- Paint three super thin whispy eyelashes on the bottom outer corners of each eye.
- Make a small curved line above each eye for the eyebrows.
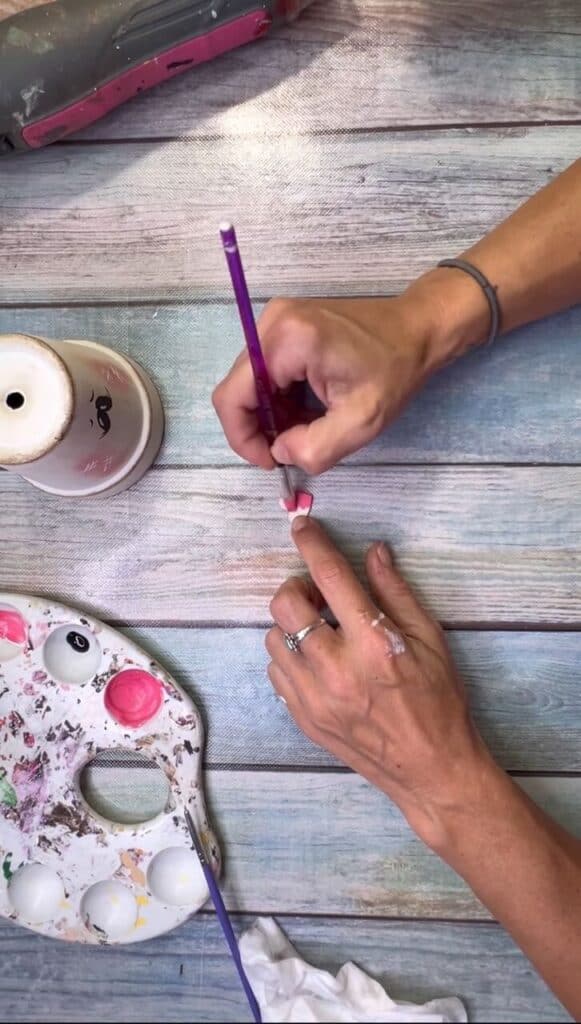
I used cheap Dollar Store blush to rub on the pink rosy cheeks.
To give the cheeks a little somethin’ somethin’, I took a thin paint brush and made “hashtags” on each cheek,
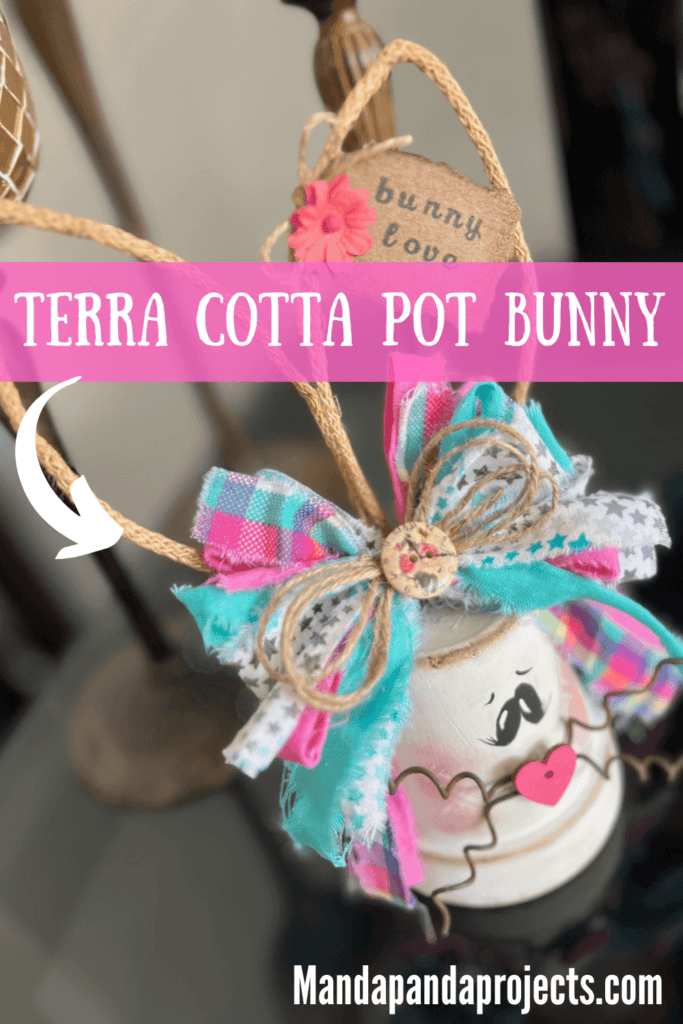
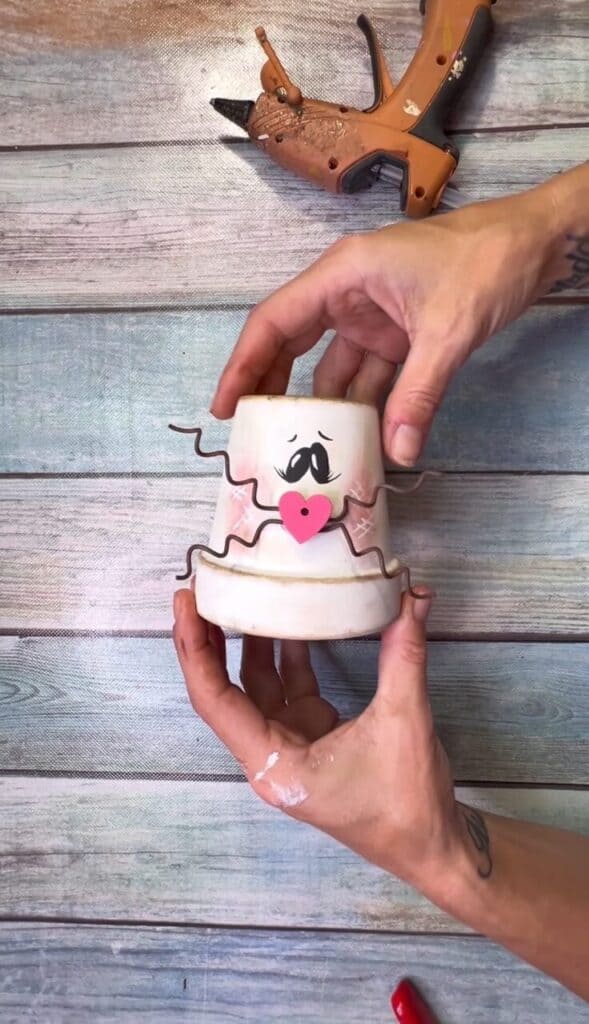
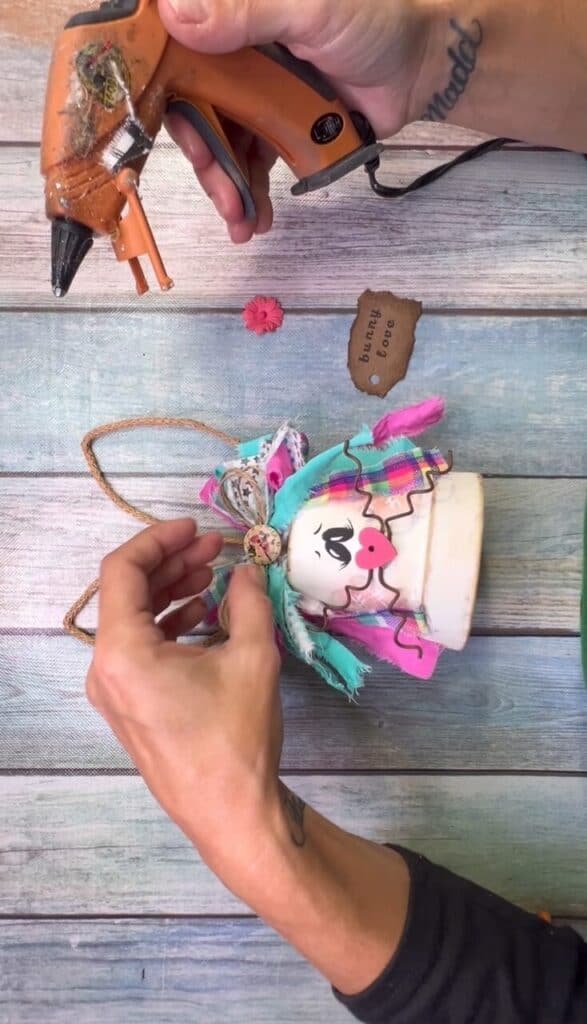
For the nose I used a super small wood heart, and painted it pink.
For the whiskers, I took some primitive rusty wire and wrapped it around a paint brush to give it the curly look.
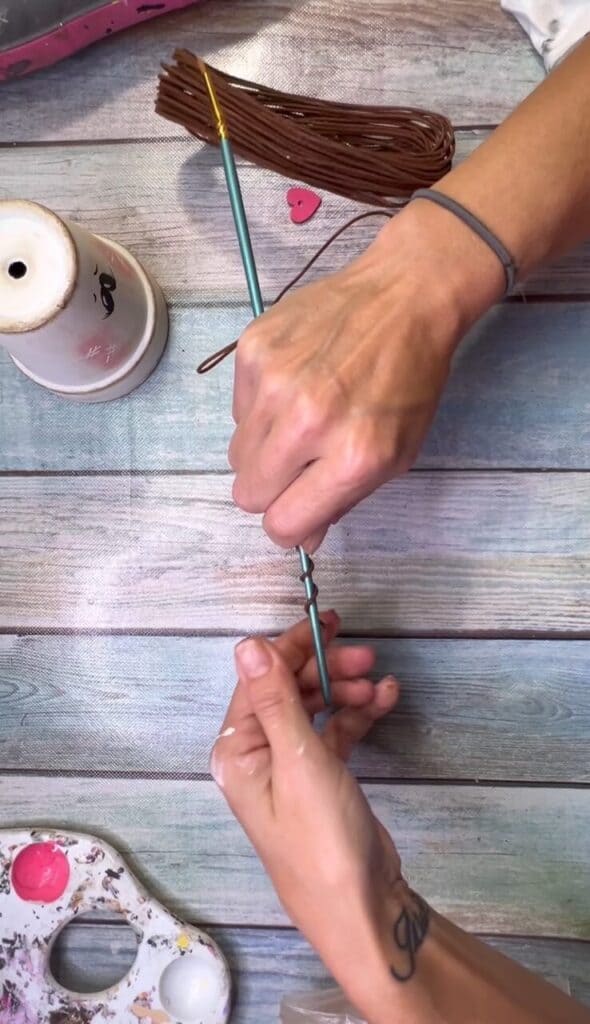
Then I hot glued them to the front of the terra cotta pot, and glued the pink heart nose on top. I prefer my nose right side up, some people do the heart upside down, you can do it however you like!
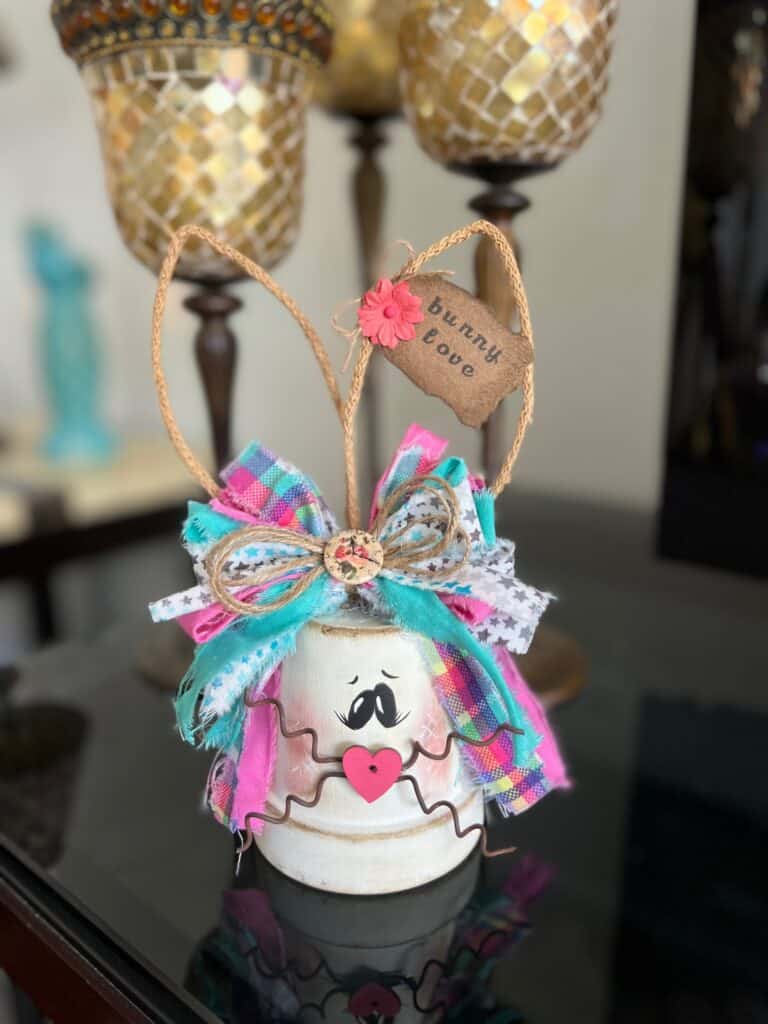
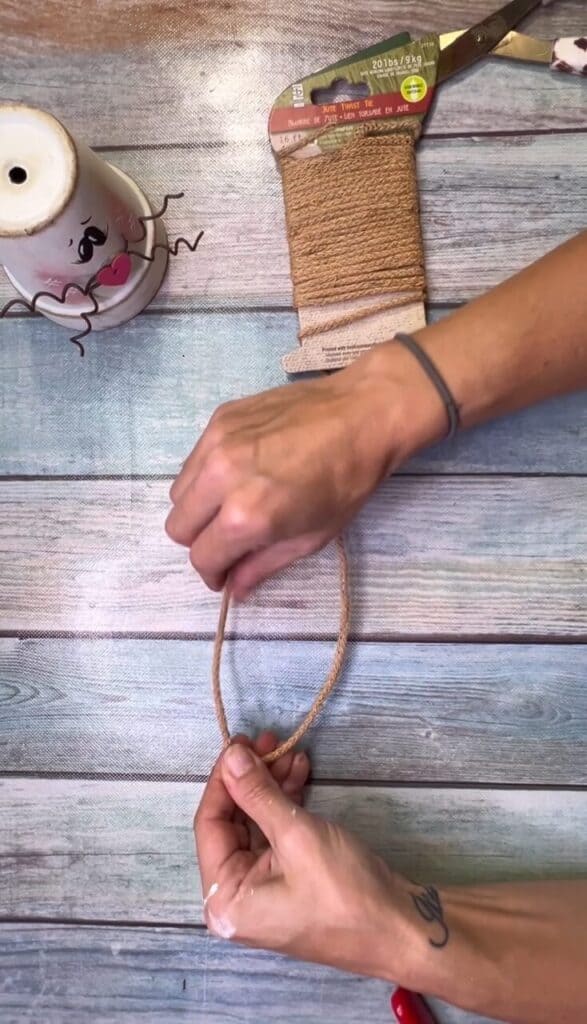
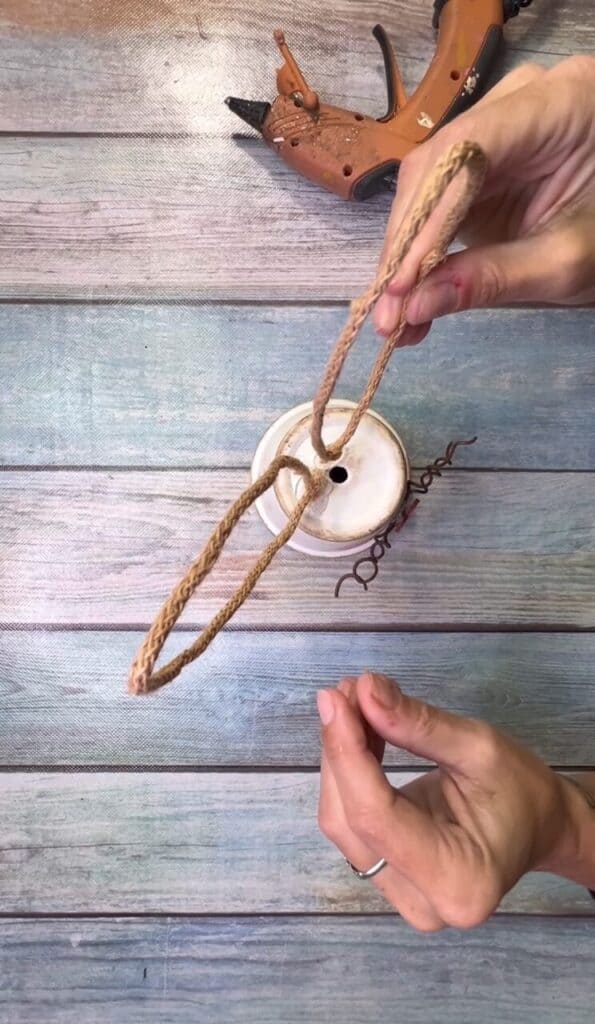
For the ears, I shaped wired jute into the shape and then twisted the ends together at the bottom.
And then hot glued them to the top of the terra cotta pot.
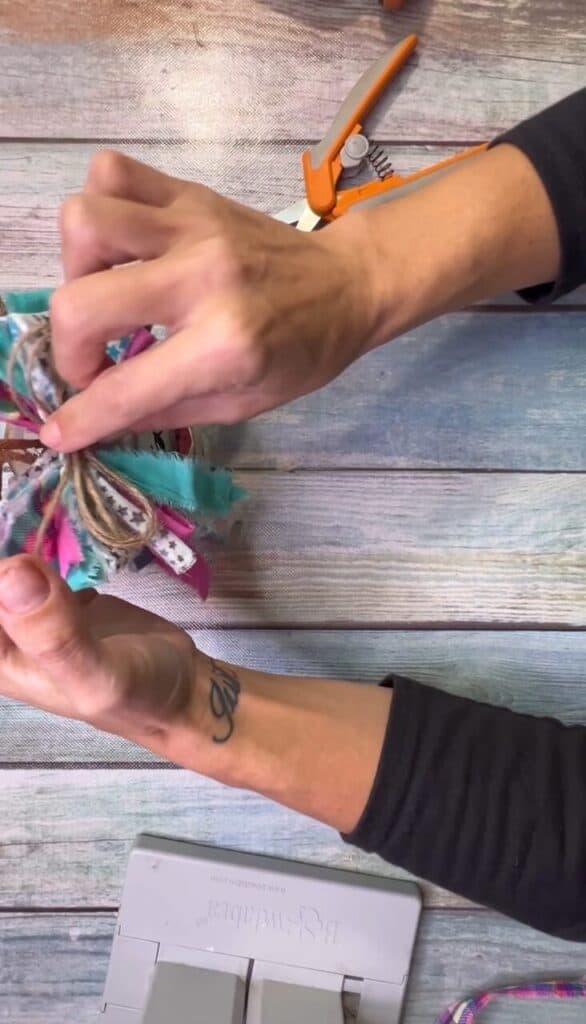
Time for the bow! I ripped up a bunch of cute coordinating fabric into 1″ strips. Each strip was about 15″ long, but they can be longer or shorter.
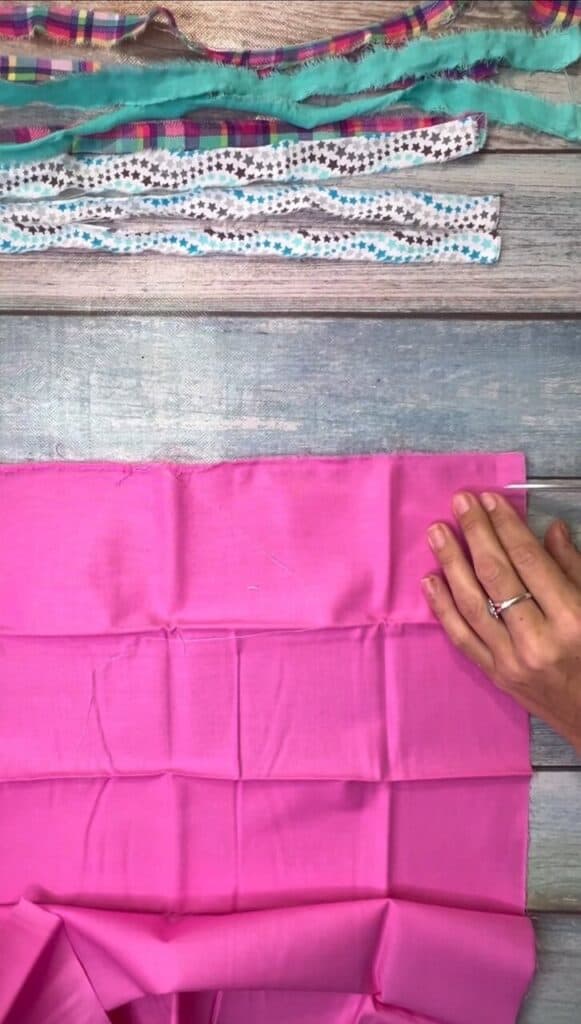
I used my Bowdabra to make a messy fabric bow, but you totally don’t NEED a bow maker, you can make any type of bow you want.
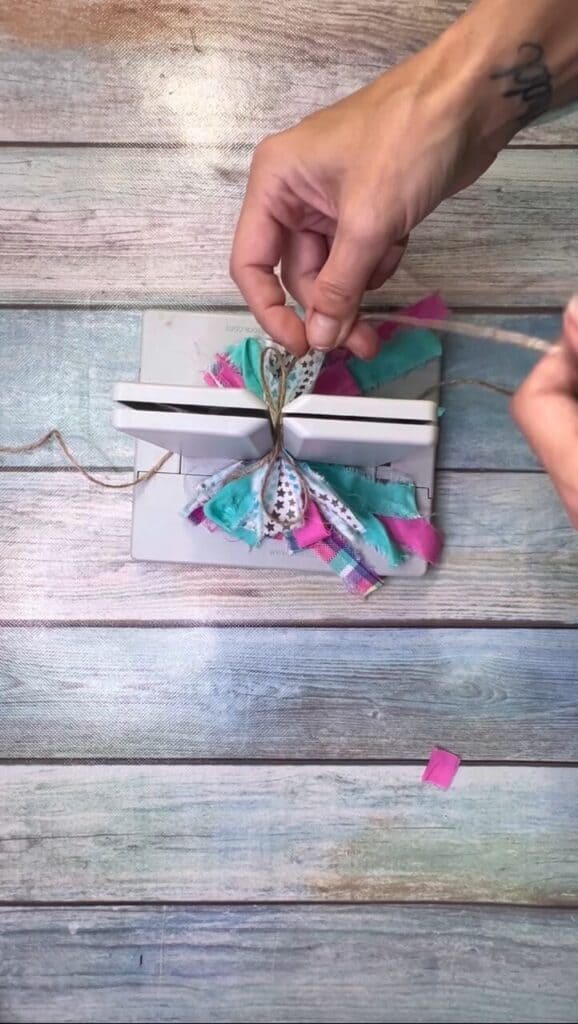
Once I had the bow tied off I glued it on top of the terra cotta pot in front of the ears.
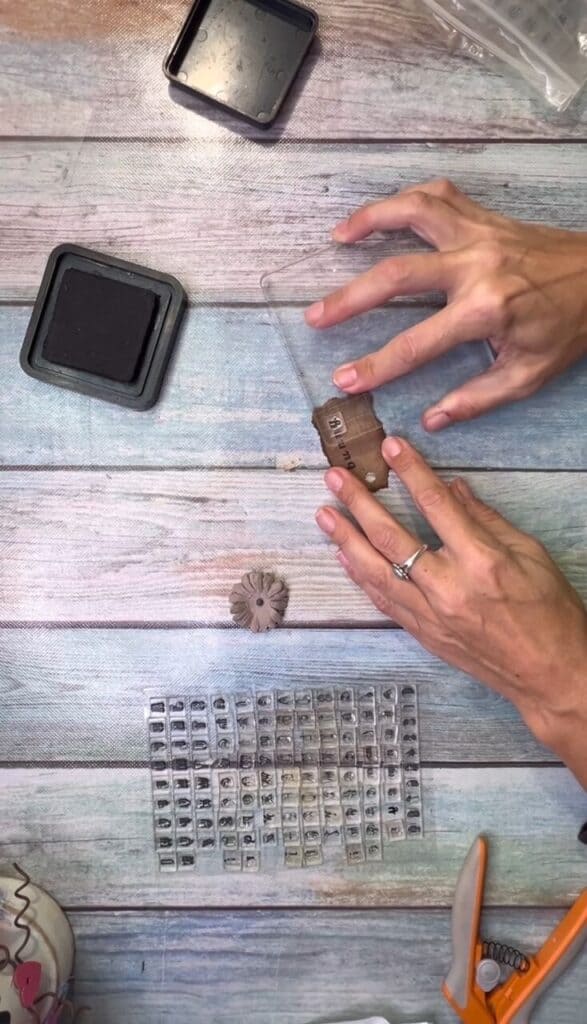
Of course she needed a little tag! I just ripped a small rectangle of Kraft paper, punched a hole in the top, and then grunged it up with the dark wax again.
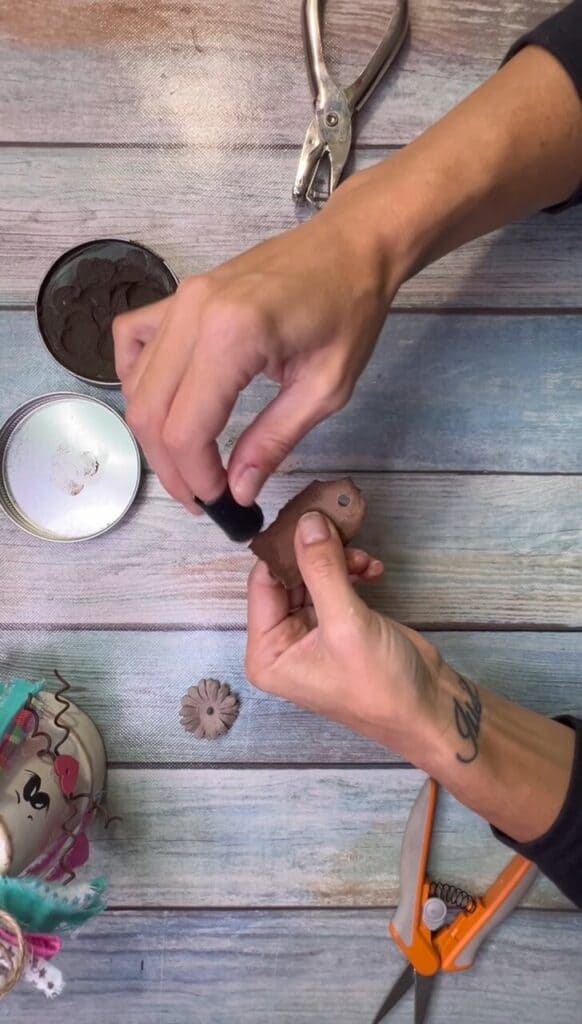
I used my absolute FAVE acrylic stamps in the world to stamp on “bunny love”, and added a small pink paper flower to the tag.
I decided to tie the tag with a shoestring twine bow to the top of the bunnys ear. You could also put the tag on the bow.
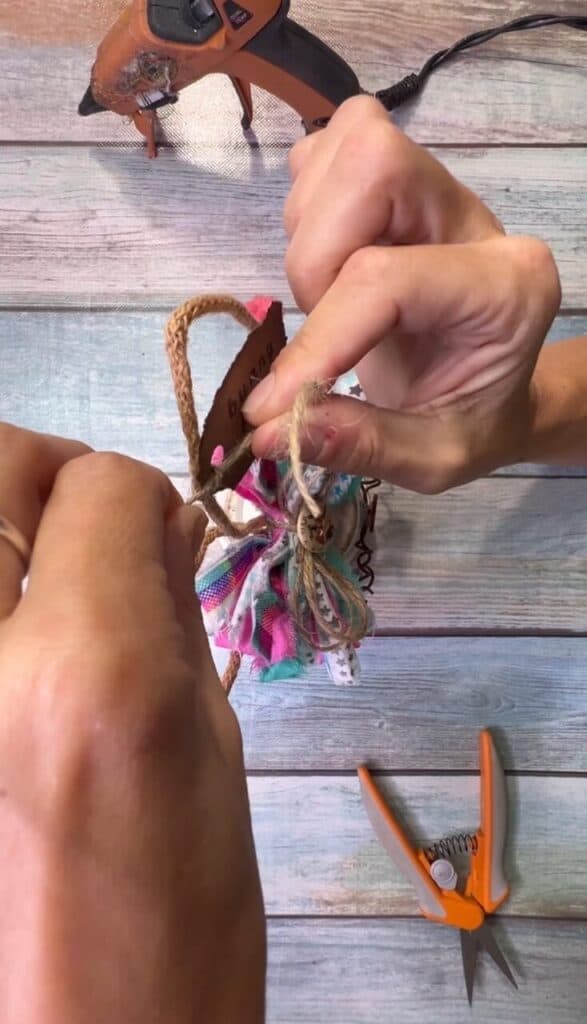
I finished the bow off with a vintage button embellishment in the center.
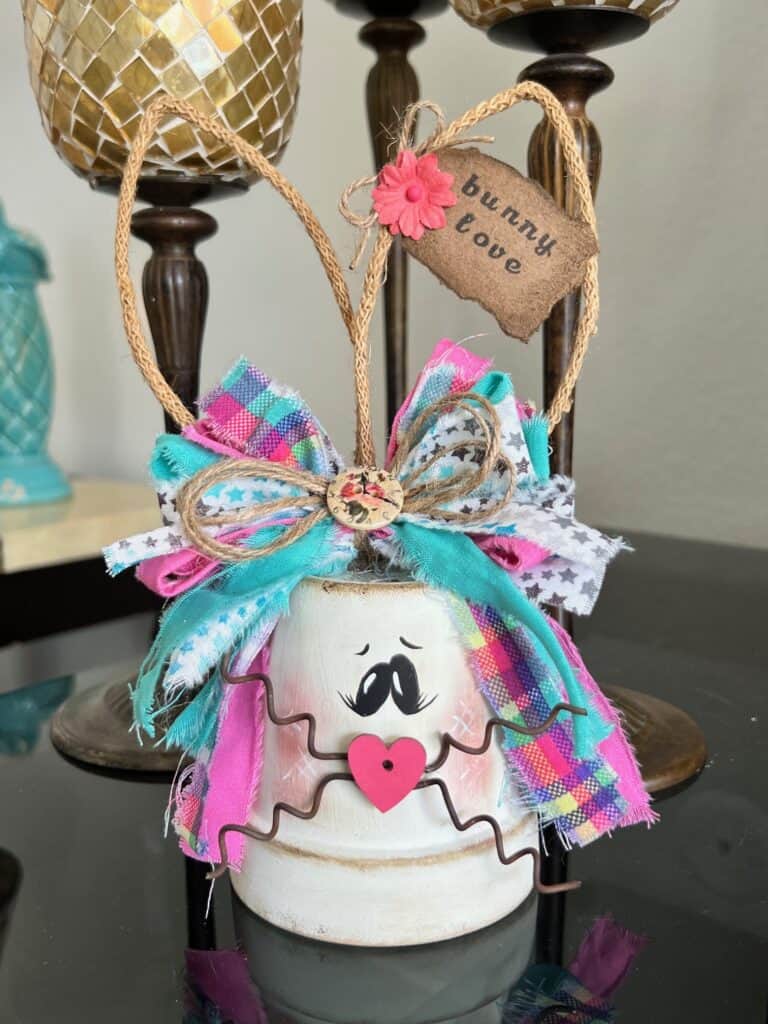
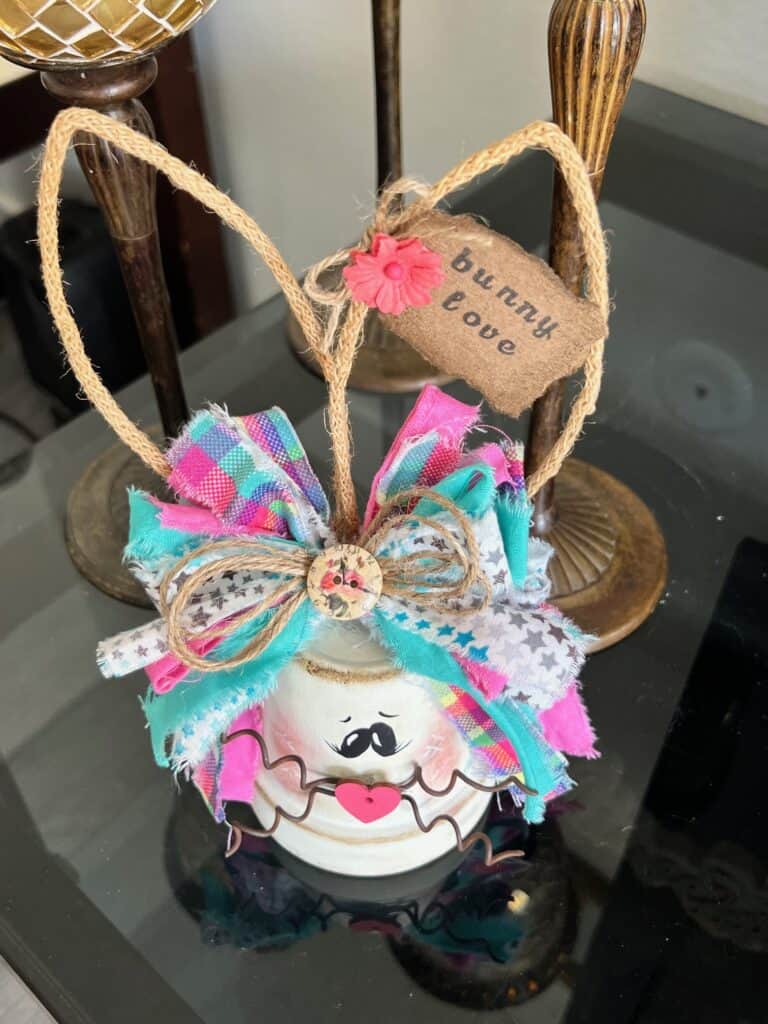
Here she is all done in all her glory! Can we say cuteness overload!?
If you need some more Bunny Inspo, this rustic Bunny decor is one of my faves! A different style from this lil’ girl, but adorable nonetheless.
Are you going to make a Terra Cotta Pot Bunny for Easter? If you do, I’d love to see it! Pop on over to our free Craftspiration Facebook group, and join in on the fun by posting a pic of your Tiered Trays, DIY’s and crafts. I just love to see all your creative and crafty creations.
If you’ve got a million projects on your crafting ‘to-do’ list like I do, than you need my FREE Craft Project Planner so you can plan to make *all the things*! When you sign up for the craft planner, I’ll also send you lot’s of fun, easy, and budget friendly ideas for you to fill it up with!
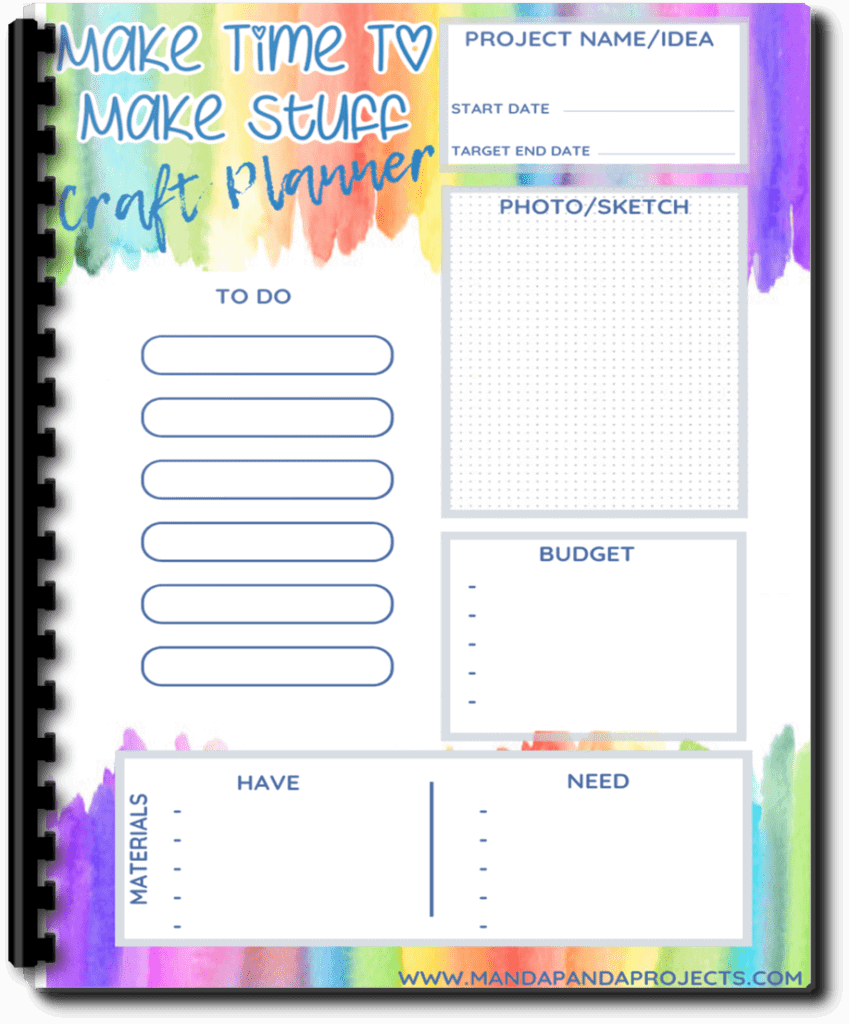
Free printable Craft Project Planner
Get organized, get inspired, and get crafting, with our free Craft Project Planner!
Until Next Time…
Stay Crafty San Diego!

Love this Terra Cotta Pot Bunny? Make sure to PIN it for later!